Engraving various items for customization, personal marking, and gifts have been very common since the Middle Ages. There are numerous techniques that you can use to personalize any item of your choice effectively.
However, most of these methods require experience, steady hands, and time. Luckily, modern technology has affected the way people engrave in a positive manner. Laser engraving is the pioneer of modern technology that allows you to engrave different materials with 2D and 3D designs.
In this article, I will explain the basics of 3D laser engraving to help you get started with your project.
What is Three-Dimensional (3D) Laser Engraving?
Before we dive into the massive universe of 3D laser engraving, it is best first to understand what 3D laser marking is. The 3D laser etching is a special form of laser engraving that involves varying the laser power on the different portions of the material to create perfect shades for a three-dimensional effect.
You can use a 3D laser cutter to engrave pictures, data, art, and designs on a suitable material.
Usually, you will need a special 3D laser machine to create such detailed engravings. With your laser engraver, you can use soft materials like plastic, wood, paper, bamboo, and aluminum. However, the designer must understand the concepts of grayscale images before getting started with the project.
Generally, the 3D print is more of an optical illusion than a physical design. The machine uses different laser intensities to form the required shades. For instance, the darker shade of the image requires maximum laser power, while the lighter shades get little to no laser cutting. So, you can say that 3D laser engraving is the art of simultaneously engraving more than one side of the image on the material.
How Does 3D Laser Engraving Work?
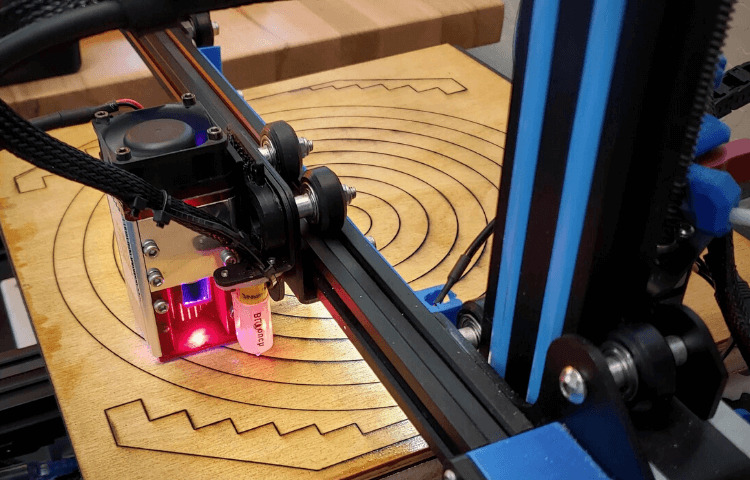
As mentioned earlier, the designer must understand the concepts of grayscale designs for printing a 3D image. It is mainly because the laser uses grayscale information to determine the laser’s path and intensity on different portions of the design.
3D laser engraving requires higher accuracy, optimization, and time than conventional 2D engraving. The whole process is computer-controlled so that you don’t have to worry about unnecessary detailing.
First, the required image is imported to a suitable laser software like laser Grbl. The software automatically converts the image into grayscale format whenever you select the 3D option. You still have the option to edit and optimize the design according to your requirements.
Next, the user must select suitable laser settings for the material at hand. Once the design is ready, the laser machine gets to work.
First, the laser beam is concentrated on the portions that require higher laser power. This produces deeper grooves in the darker regions to establish a basic outline. The laser intensity is gradually decreased with every turn to complete the design. The whole process is repeated until the design is complete.
However, 3D engraving takes a significantly larger time than traditional engraving, but the end result is worth the effort. Finally, a rough laser pass is applied to the whole design to seal the edges of the material. In some cases, you are required to wipe the product with a clean cloth to remove debris and mold from the surface.
Difference Between 2D and 3D Laser Engraving:
The mode of operation for both 2D and 3D engraving is very similar. However, the 3D engraving requires greater accuracy, a premium engraver, and an optimized laser module. It is because the 2D laser engraving focuses only on the X and Y planes of the design.
On the contrary, 3D laser engraving utilizes X Y, and Z planes in its operation. Here, the X plane stands for length, Y means width, and the Z plane refers to the depth of the engraving.
Another major difference between the two forms of engraving is the depth. The depth remains constant throughout the design in a 2D laser engraving. In comparison, the depth of engraving depends on the required shade and orientation of the object in the 3D laser marking.
Similarly, the laser power remains the same in the whole process in a 2D design, while the laser power is automatically changed by the software when 3D engraving a material.
In short, laser 3D printing is a far more complex process than other forms of laser engraving.
What Makes It so Special?
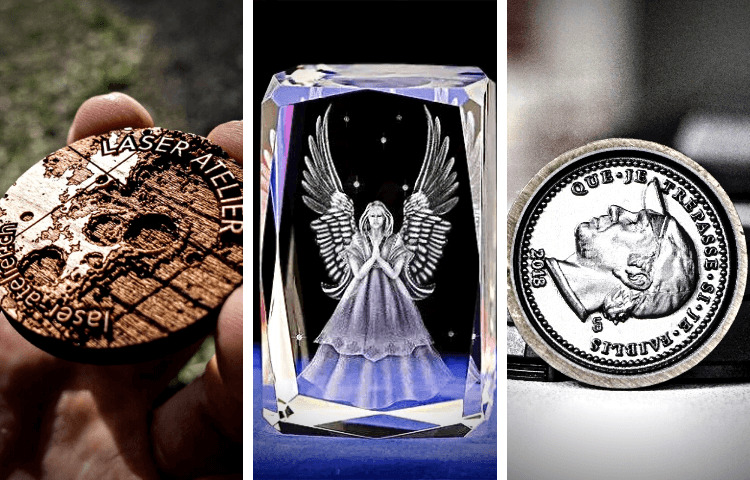
3D laser engraving is a vast field with endless possibilities. The technology has great potential for both simple DIY projects and industrial units. The extra plane that you get with three-dimensional printing unlocks whole new levels of creativity.
As a result, the majority of manufacturers use 3D engraving machines for marketing, branding, and their products. Here are a few benefits of the 3D laser engraver.
Tension-free Experience:
The most common problem faced by designers in 2D laser engraving is the consistency of the laser. As you need a constant laser beam for the whole design, even a slight change in the laser power can have absurd effects on the final design.
However, you won’t encounter such issues with a laser engraver 3D because it automatically adjusts the laser power according to the design. Thus, the depth of the engraving is free from human and machine error. Similarly, the whole process is monitored and controlled by computer software.
So, there is no need to monitor the design actively, and you can focus on other aspects of the project. In short, 3D laser engraving is an automatic procedure that requires little to no effort on your end.
More Work Areas:
The work area is of utmost importance when it comes to laser engraving. The work area determines the type and size of the material that you can use for the project. Usually, 2D laser engraving machines have a smaller work area ranging from 200 x 200 to 300 x 300.
This means that you can only use small sheets of material at a time for the design and the images need to be resized accordingly. On the other hand, the 3D laser machines have a significantly larger work area ranging from 400 x 400 to 600 x 600, respectively.
The area is further enhanced if you choose an industrial unit. However, 3D laser printers are far more expensive than typical 2D laser devices.
Wider Scope:
Overall, 2D laser engravers come with several limitations, especially in the material selection. You are limited to choosing from a small selection of materials and that too with symmetrical dimensions. Moreover, you need a smooth surface on the material to engrave 2D designs and logos effectively.
However, 3D laser engraving is free from all these limitations. You can choose any material that you want, even if it has an irregular shape. For instance, 3D laser devices are capable of engraving on curved surfaces, cylindrical objects, and sloped surfaces.
So, you can use your device to make 3D prints on various items regardless of the shape and material. Moreover, you can use all sorts of complex images to imprint without any optimization.
Choosing the Right Materials & Parameters:
The success of any 3D laser engraving project depends on two factors only, i.e., the choice of material and the engraving parameters. These factors enable you to achieve the desired color, shade, design, and depth of the product.
Materials:
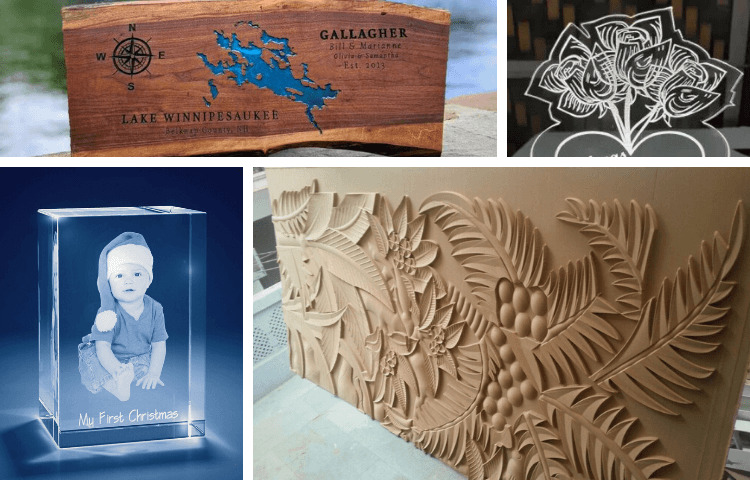
You can choose from a wide range of materials to go with your 3D engraver. For best results, I recommend that you choose one of these materials for your project:
Acrylic:
Acrylic is among the top materials used for laser engraving in the industrial sector. The material has pretty similar properties to wood and bamboo but with an impressive melting point.
Moreover, acrylic materials have modified properties that prevent them from erosion, environmental damage, and chemical reactions. As a result, most of the billboards and signboards that you see on the street are made from acrylic material. The hardened properties of acrylic material make it the best choice for 3D laser marking.
Hardwood:
Hardwood is another top material for 3D laser engraving. The wood species like cherry, birch, maple, and walnut are the perfect choices for your project. Hardwood is a sturdy material, and the engraved design gets a natural and authentic look.
The wood burns instead of melting under the laser. However, the final product gets stylish burnt marks that further enhance the detailing of your 3D design. You can always clean the extra burn marks by wiping them with a clean cloth.
Crystal:
Crystal is the perfect material for engraving on a transparent surface. Glass is an inert material, so it is safe from the hazards of chemical reactions, radiation, and other environmental factors. As a result, designs 3D engraved on crystal or Glass have a longer lifespan than other materials. Similarly, it is the cheapest material for 3D engraving, and you can get it from your local market without any problems.
MDF (Medium-Density Fiberboard):
The problem with most 3D laser engravable materials is that they are very expensive and hard to find in the market. Most of the time, you have to contact different manufacturers to get access to the material.
Fortunately, MDF is different from other materials suitable for laser engraving. It is a soft material that comes at an affordable price and is readily available from your local market. Moreover, you can also paint the material once you are finished with the engraving to add to the elegance of your design.
Parameters:
The second decisive factor for successful 3D engraving is the hardware and software parameters of your setup. You need a suitable machine with efficient laser power to complete the project with minimal effort. In this regard, it would be best to keep the following points in mind:
The Right Choice of Machine:
The market is full of products boasting 3D markings. However, not all of them are as practical as the manufacturer has advertised. For example, you can get two types of lasers in the unit: RF and DC.
The DC lasers have low laser power and don’t work on hard materials for permanent effects. Moreover, it requires several passes to complete the job, adding to the total cost and effort of the project. Therefore, make sure that you buy a 3D laser engraver with an RF laser module in it.
Secondly, your laser engraver must be capable of quick pulse durations in order to get different color shades in the design. As a 3D laser engraver is a one-time investment so don’t mind spending a little extra as it will only benefit you in the long run.
Professional Design:
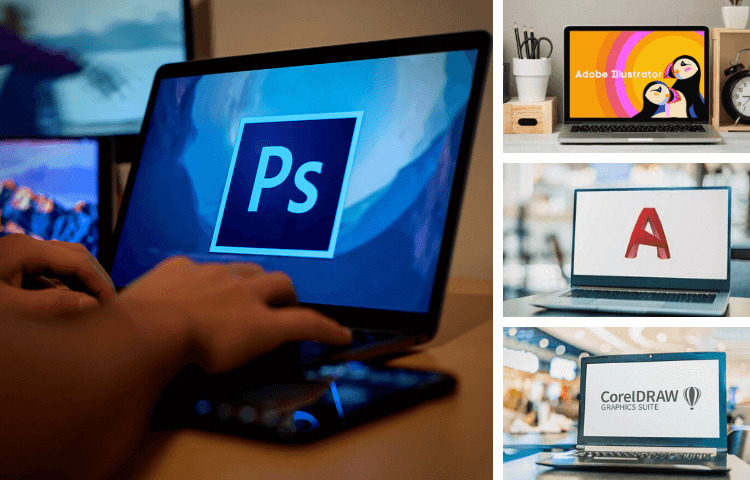
The final result of your project depends on how well you have designed the artwork. Never use images downloaded from the internet as most of these images have low resolution, and the pixel quality isn’t as high-quality. Instead, design the artwork from scratch or hire a professional for the job.
You can use various software like Adobe Photoshop, Illustrator, CorelDraw, ArtCAM, and AutoCAD for the job. The depth of the engraving depends on the grey shading of the image. So, the first thing you must learn is to work with the 8-bit or all 256 shades of greyscale.
Best 3D Laser Engraver and Printer:
As mentioned earlier, not every 3D engraving laser machine has practical applications.
So, you must be very considerate when choosing a product as it is an expensive investment. In my opinion, the Glowforge Plus 3D is the best option for 3D laser engraving and printing. It is an automatic laser engraver that detects the type of material and adjusts the settings automatically.
Furthermore, you don’t have to bother to learn a whole new 3D laser engraving software to get started with the project. In order to print with the Plus 3D, all you have to do is push a single button, and the device will take care of the rest for you.
Frequently Asked Questions:
How does 3d laser engraving work?
The 3D laser engraving uses different laser power to produce various shades of gray on the material. The darker shades require maximum power, while the light shades require lower laser power. However, all this is controlled with the laser software, and you don’t have to worry about these settings.
How to laser engrave a 3d texture?
The 3D texture of the material is produced through a combination of low and high laser power. The high laser power produces deeper grooves on the material and vice versa. You will need a suitable RF laser engraver and material for the project.
How to design for 3d laser engraving?
In order to design for a 3D engraving, you must first understand the concept of 8-bit and 256 shades of grayscale. You can use your preferred design software like AutoCAD, Adobe Illustrator, and ArtCAM for the job. Moreover, always export the artwork in high-quality PDF format to avoid any mishaps.
Conclusion:
3D laser engraving is a modern technique to imprint three-dimensional designs on a wide range of materials. However, you need to keep certain factors in mind before getting started with such a project. Therefore, I have discussed all those factors in simple language to help you understand the concept.

