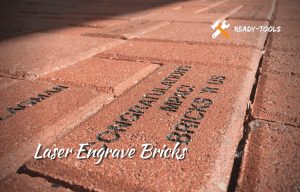
The laser works the same way as a knife when sculpting something, but it is considerably more accurate since it is directed by a machine rather than human hands. Because of its accuracy, it also creates far less waste.
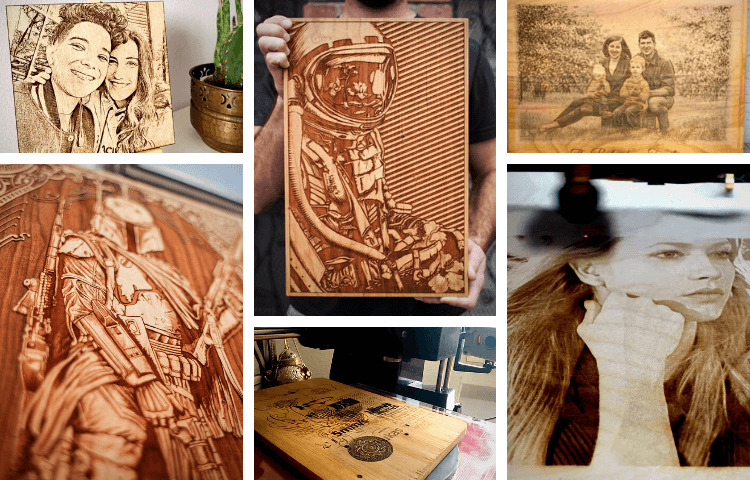
Both of these characteristics make laser engraving an excellent choice for transferring pictures to a different material. With laser engraving, you don’t have to worry about losing the crucial details that make photographs such ideal keepsakes of your most memorable events.
Furthermore, you have a wide range of materials to select from, including plastics, wood, glass, stone, and metals, making the technique a popular method of creating art and jewelry. It’s only a little step from there to laser etching your photographs in the same manner as before.
Table of Contents
Why Laser Engrave a Photo?
Engraving has progressed significantly from the days of simple engraving machines. Currently, it is a highly specialized and automated procedure that offers choices for any media. Wood is one of the most often used building materials among the many types.
Most individuals have come into contact with engraved wood by using carved wood signs, house numbers, trophies, and furniture in the past. Wood engraving, on the other hand, is far more complicated than it appears at first glance. This article will go over the fundamentals of wood engraving and why it’s a worthwhile investment for any business to consider.
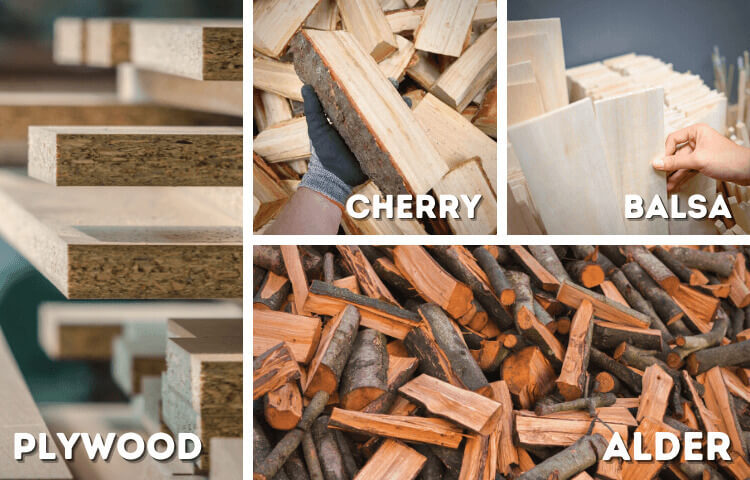
What Type of Wood Should You Choose?
Wood usually burns deeper or lighter depending on how much resin or sap is present in the wood. Depending on how much resin is in the wood, the laser beam will burn and push it into the wood, creating a black burn.
The laser beam will evaporate the wood’s low resin concentration, leaving just a little burn on the surface. Alder and cherry woods are known for having a high amount of resin.
How to Pick the Best Wood?
The most accurate approach to assess the resin content of a plaque is to conduct a test on the reverse side of the plaque that will eventually be engraved. Making a test piece, with your company’s emblem laser engraved on the back is an excellent method to conduct a test without damaging the piece.
Two tasks may be accomplished as a result: first, you can determine how black the burn should be, and second, you can mark your goods with your company logo. If the plaque is lighter in color than the wood species typically exhibits, it may indicate less resin.
Another technique of determining if a plaque contains low resin content is to examine the color of the plaque, even though this method of determining the resin content is typically correct.
What are the Benefits of Engraving Photos on Wood?
When it comes to working with your photographs, laser engraving offers several advantages:
- Preservation:
The lifetime of pictures has decreased exponentially in direct proportion to the ease with which they may be taken. When it comes to preserving your cherished memories, laser engraving your photographs is a highly reliable option. Furthermore, you will not be required to purchase a frame.
- Fine Detail and a Wide Range of Options:
Because of its accuracy, laser engraving allows you to create artwork that preserves the degree of detail you saw in the original photograph. With that level of clarity, adding a laser engraver to your collection is as simple as putting money in your pocket.
By copying the same picture onto different surfaces, you may bring out different parts of the image, which you can then play up or down depending on your creative mood. Laser engraving your photographs allow you to play with photography in ways that Photoshop cannot replicate.
- Gifting:
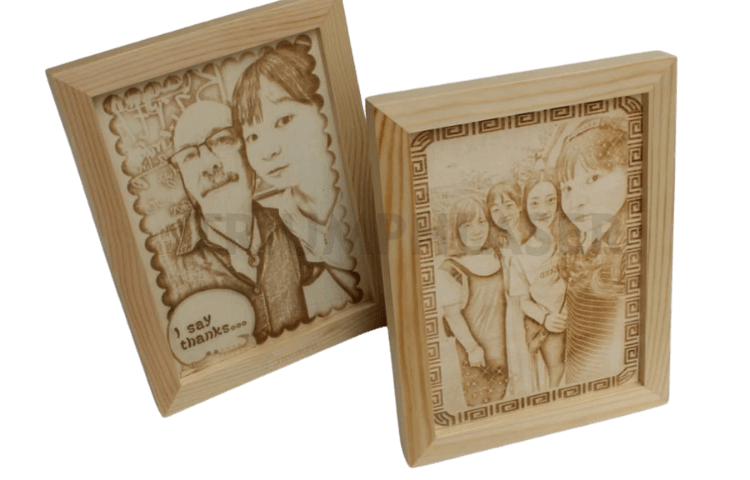
To keep your photographs secure, laser engraving them is a visually appealing way to present them. With the flexibility to apply it to ornamental or useful things such as jewelry, candle holders, bookends, and plaques, you have an almost limitless number of possibilities for making your favorite memories even more special.
Requirements:
Although laser engraving your photographs is a straightforward procedure, it does need the use of a few specialized tools and supplies. Listed below is everything you’ll need to get things started:
- Dynamic Photograph: Select a sharp image, has many details, has a lot of color gradient from dark to bright, and does not contain huge blocks of solid color. Clear photos of faces, for example, provide a high degree of detail and intrigue, and they are simple to clip out of a backdrop if necessary, as is the case with many other types of photographs.
- Software: This stage can be completed with whatever you are most comfortable with. There are a plethora of free applications available that include everything you need, so as long as you can crop, remove a backdrop, and sharpen, you’re good to go.
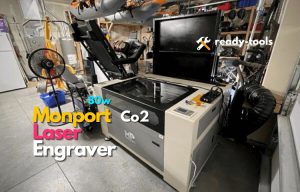
Choosing the Best Laser Engraver for Photo Engraving
You will need to purchase different equipment created particularly for laser engraving your images, which is one of the only disadvantages of your photographs.
You won’t be able to utilize your 3D printer, laser scanner, or anything else, and building your equipment will cost you a few thousand dollars for high-quality results.
The Glowforge Plus provides you with a high-quality laser engraving environment. It has quick printing rates and a stylish appearance, and it is compatible with a wide range of device operating systems, allowing you to print straight from your phone if you desire.
Procedure to Laser Engrave Photo On Wood:
Now that you’ve been properly prepared, it’s time to get down to business: playing with lasers! Do not fear; laser engraving your photographs will take far less time but require significantly more work. The steps are as follows:
Step 1: Edit your Photo with Software

Cutting and removing the backdrop are optional but highly recommended actions to take before using your laser machine. However, it is necessary to transform the photo to a simpler indexed color scheme before converting it to grayscale.
This implies instructing the computer to show your shot using a more limited palette of colors. However, you can transition from color to grayscale far more easily than if you used all of them by utilizing fewer colors.
As previously said, this phase is required because it collapses the gradient & shifts into something that the laser engraver can comprehend and utilize as a carving tool.
Step 2: Convert the Photo into Bitmap (BMP) Format
Another stage in which you should not utilize separate picture software is editing the photos. If your existing editing application, on the other hand, does not include this conversion or saving feature, you may open and convert your photo using Paint in Windows.
Step 3: Send the BMP image to your Laser Engraving Machine
Once you’ve reached this stage, the laser will take care of the rest. It works in the same way as a 3D printer in that you transfer your file to the laser engraver either physically (through a USB drive) or directly into the engraving machine. When you press the “start” button, you’ll be able to see your work come to life.
Tips for Best Results:
Here are some tips to get the best results:
- Test Engraving: Gradients in a photo can be made sharper or softer by adjusting the tone contrast between dark and bright regions. These progressive adjustments are reflected in your engravings when these parameters are across a range rather than on/off. However, you won’t know how that translates to the explicit material and photo you’re using until you test it to see whether it meets your vision.
- Exclude big monochromatic sections and vast backdrops with few subjects: Neither sort of photograph portion provides enough information to laser engravers to produce a clean copy. Use a white or transparent layer to replace the backdrop in your picture editing program; engrave well if you have a shot with a huge solid colored background and a diverse foreground.
Final Words:
We hope you found our blog post on laser engraving a photo on wood to be informative. When you have the option to engrave a photo on wood, it is a wonderful way to display your best memories in a unique way that you can enjoy for many years in the future. With all of the numerous wood possibilities available, you are sure to discover the perfect wood to complement the design you want to show on your wall.
