It doesn’t matter if you’re an expert engineer or a beginner laser engraver; you must understand how to use the equipment correctly to prevent laser engraving mistakes and potential dangers. It takes both time and experience to build up the knowledge necessary to avoid making these blunders. Customers frequently come back with concerns and complaints, leading designers to wonder where they went wrong.
If an error occurs during laser engraving, you should use wood putty or filler to fill the affected area. The wood filler should be used for significant mistakes. Give the goods enough time to dry out completely. Sandpaper with a beautiful grain should then be used to polish the surface.
This is especially true in all sectors relating to product customization, with laser engraving being one of the most prevalent subfields in this category. Recognizing these errors and consciously correcting them is just half the fight.
The following is information on some errors in laser engraving that a beginner laser engraver typically makes.
Laser Irradiates and Tears Through the Fabric:
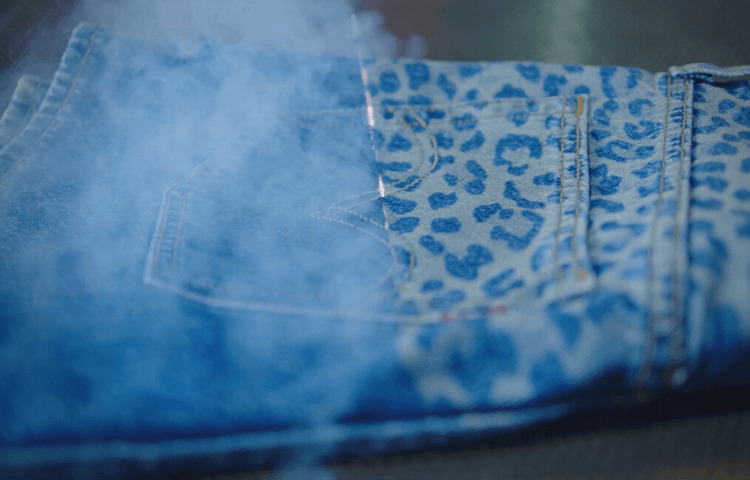
To prevent the fabric from catching fire in the first place, you need to understand the types of materials and the temperatures they can endure. During engraving, sturdy fabrics like canvas, leather, and denim can take greater temperatures, while more delicate fabrics cannot.
It is best to keep the settings at high speed but with low power when working with thin material. First, test these settings on an extra piece of fabric to see if or not it will be able to tolerate it. You should raise the power to get the desired results if it can.
During DTG engraving, it might be wise to keep the DPI lower. Engraving with a lower DPI helps guarantee that the Laser slightly vaporizes the top layer of the fabric rather than completely burning through it. This is important since engraving at a higher DPI will remove more material. Most competent engravers use a resolution of between 150 and 300 DPI while working on cloth.
Fractured Glass Engraving:
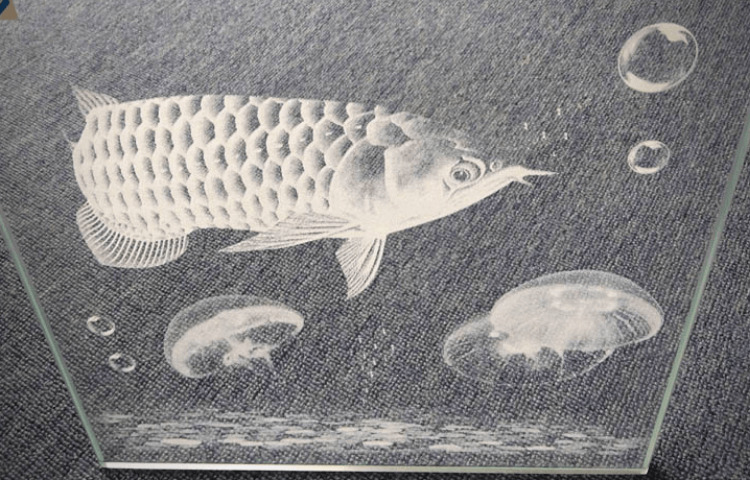
When the Laser impacts the glass, it frequently cracks the surface while simultaneously failing to engrave profoundly and remove the material it ought to have. The cracked glass surface will appear frosted, but depending on the type of glass used, the surface may also be rough and chipped.
You might want to try using a lower resolution to solve this issue. To optimize the engraving process and reduce the heat generated, you may try placing several sheets of moist paper over the area to be engraved.
You might want to experiment with making the black pattern only 80 percent black. If, after engraving, you discover shards of glass, you may remove them by polishing the region with a scouring pad that does not scratch.
The Same Settings Led to Different Outcomes When Applied to the Same Wood:
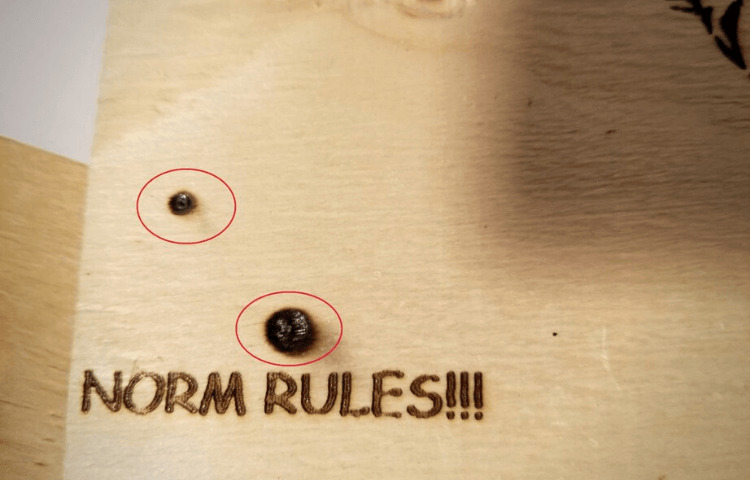
Wood is one material that responds best to the laser cutting process. Because it engraves nicely and can also be cut cleanly, it is the material of choice. However, laser engravers need to bear in mind that various types of wood respond uniquely to being Laser engraved, and as a result, the finished product will vary depending on the type of wood used.
Some lighter woods, like cherry and maple, offer a more pleasant contrast, but denser woods demand a higher laser power setting. Cherry and maple are examples of these lighter woods. Additionally, you need to take into consideration the grain density.
The wood you use can significantly impact the quality of the engraving you create. If you were to carve a letter onto a piece of cherry wood, that letter would always look the same. However, the look of the same letter etched on oak would be inconsistent. Oak has a grainy texture.
The Productivity of the Laser Engraver Has Decreased:
You will know that it is time to do maintenance on your laser engraving machine when you see that it is becoming less productive. By doing maintenance at regular intervals, you can preserve your equipment in an almost brand-new condition. Check the user handbook for the laser equipment to see all of the necessary maintenance procedures.
If you suddenly notice a decline in performance, cleaning the optics is an excellent place to start looking for the cause. It is strongly recommended that you clean the lenses and mirrors weekly. On the other side, if the materials generate a more significant amount of residue, like wood or acrylic, you will have to clean your lenses more regularly.
Common Laser Engraving Mistakes and How to Fix Them:
Many misunderstandings and errors are connected to the operations of laser engraving. It happens most often when we do not have a thorough grasp of how lasers work, their appropriateness for certain materials, and the procedure itself, and when we fail to comprehend the process and do so carelessly.
Every Metal and the Polish It Has Is One of a Kind:
It is a frequent misconception that all metals can be engraved; however, this is not always the case. This is also true for the majority of the metals. On the other hand, this presumption can turn out to be incorrect. For instance, we are unable to obtain the desired engraving result on metallic surfaces that are rough and nonuniform.
Similarly, there is a danger involved in engraving a material that has been plated with metal. If the plating quality is poor, there is a strong possibility that the metallic plating will peel off instead of being engraved with a design.
Any error will result in ramifications that cannot be undone when working with hard metals. When working with soft metals like gold, any incorrect engraving may be rectified by polishing the surface to the appropriate degree.
It is possible that any engraving-related mistakes if the surface is rough or metal-plated, will be useless. Therefore, to avoid making any mistakes, it is preferable to exercise caution and acquire an adequate level of knowledge regarding your metal.
Glass with Shards and Other Irregular Characteristics is Carved With a Laser:
When a laser beam of sufficient intensity strikes the surface of the glass, micron-sized cracks are produced on the glass’s surface. These microscopic cracks lend an air of sophistication to the surface of the glass through the creation of intricate patterns.
If it is not done correctly, it will leave the surface of the engraving with a rough texture and little shards. The following suggestions might help produce engravings of a high grade on glass:
First, Put Your Glass to the Test:
There are several varieties of glass material on the market, each of which is distinguished from the others by its specific chemical make-up. Because laser engraving includes vaporization, it is possible that the process will not function in the same manner for all types of glass. Lead, rather than calcium, is used in manufacturing crystal glass.
Crystal glass is susceptible to producing uneven engraving features due to its lead component, which makes heat dissipation in crystal glass less effective than in other types of glass. It is often a good idea to test your glass first and make any necessary adjustments to the settings to achieve optimal laser engraving.
Flat and Curved Glass:
Regarding the microstructure, we may anticipate a high level of homogeneity in flat glasses. In the curved glass, however, the microstructure and, thus, the amount of hardness may not be consistent over the whole etched region. We will acquire nonuniform frosting characteristics in the etched area due to the uneven way light interacts with the surface.
This type of irregularity can be accounted for, at least to some degree, by keeping the laser speed, and consequently the exposure duration, at a medium level while maintaining a high level of output laser power.
Dissipate the Heat:
It is possible to use some damp masks to dissipate the heat conveniently. It will have a softening effect on the shards in the carved picture.
Apply Polishing if Necessary:
If, after trying all of the strategies above, shards are still there, we will need to resort to polishing to remove them. Take extra precautions to prevent scratching the etched surface at all costs.
Conclusion:
The process of laser engraving is as near as current technology comes to being “plug-and-play,” but it is crucial to remember that there is still a learning curve involved. Learn some trade tricks, and be meticulous about testing samples and documenting your favorites. With some mindfulness and attention to detail, you’ll be creating extraordinary results in no time!

