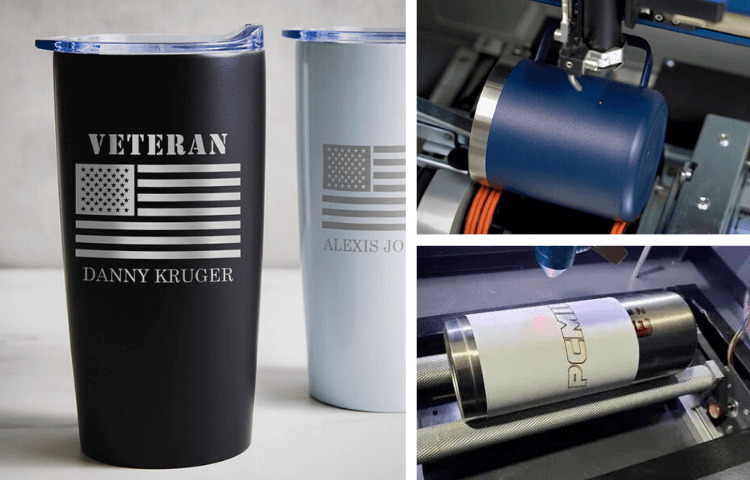
Many individuals are laser etching their Yeti cups with some of their favorite designs for a more personal touch to give them a unique look. Laser engraving allows people to personalize their cups by applying their designs to them using a laser.
It could be a logo, someone’s name, or anything else. In addition, witnessing the engraving of a Yeti can be quite fascinating. It is a great way to promote your company and ensure that your emblem is always visible and displayed by engraving Yeti cups with your company’s logo.
Yeti Cups are popular among many people who purchase them for a variety of different reasons. The benefits that Yeti provides are appreciated by some people, while others have been engraving their Yeti cups for several years. This blog post is intended to demonstrate yet another way in which you can personalize your Yeti cups.
Can Yeti Cups be Engraved?
To summarise, the answer is yes! However, when engraving smooth surfaces such as glass, ceramics, stainless steel, and so on, you are engraving a smooth surface.
Yeti cups are made of glass, which means that engraving on a textured or veined surface such as glass requires a different engraving technique. This blog post discusses how to engrave Yeti cups with a laser in a Step by Step Process.
How to Etch Yeti Cup?
Here is a step-by-step guide on how to etch colored yeti cup easily.
Step 1: Preparing for the Engraving Process
There are a few things that need to be completed before the engraving can begin. The Yeti cup must be scrubbed with a Metal Identifying Solution and allowed to sit for approximately 5 minutes before being used again.
In addition, you must ensure that the angle of the artistic file and the rotary machine is the same. Rotary machines can be used at 90 degrees and 180 degrees, though 90 degrees is relatively more stable while cutting.
This is a very precise process, and even the smallest error can cause everything to fall apart. To achieve the best results, it is essential that everything, including the Yeti cup, be precisely measured. Here are some additional details regarding this.
Step 2: Yeti Cup Measurement
First, you should examine your Yeti cup to determine where you want the art to be displayed. Once you’ve determined this, you’ll need to take measurements of the Yeti. For this, you’ll need to make use of a fabric ruler. This sort of ruler is suggested because it is flexible and can be bent easily with little effort. These are also extremely inexpensive and shouldn’t set you back more than a dollar or two.
Take a ruler and calculate the length between the surface of the cup and the edge of the cup from one end to the other. The spacing of the art in the software architecture will be determined by the measurement you obtain. Then you’ll need to figure out how big the Yeti’s largest diameter is by measuring its circumference. This measurement will determine the altitude of your artwork.
Following the completion of the measurements, it is necessary to enter them into the design software. Once again, precision is critical in this situation. Ideally, you don’t want any of the artwork to wind up on the Yeti’s backside eventually or to be stretched out further than it was originally planned. As a result, if the ruler indicates 1/16th inches, that 1/16th of an inch must be entered into the computer software.
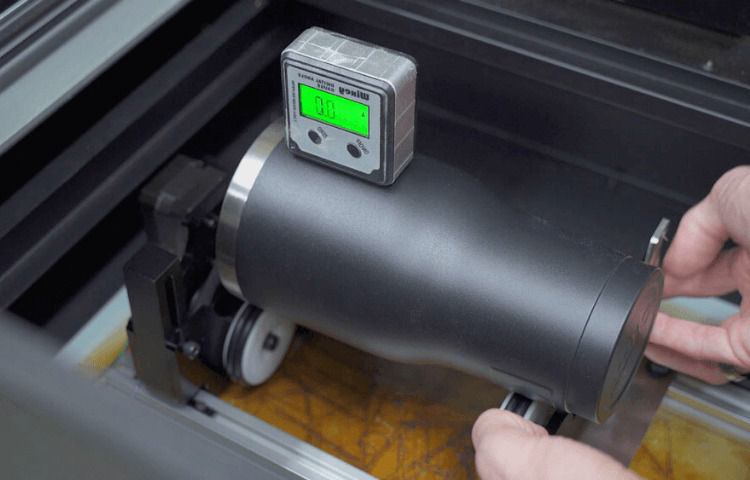
Step 3: Making an Engraving of the Yeti Cup
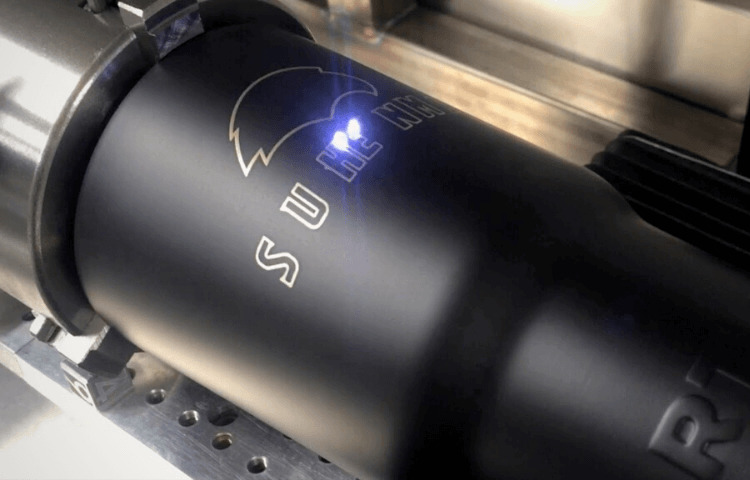
Once you’ve secured your mug in its proper position, you’ll want to check that the overall height of the Yeti cup is correct. This is the case because the Yeti is lying down and being rotated while it is being etched. If one end of the canvas is tilted marginally higher than the other, the artwork will appear disproportionally large. If everything is in working order, all that’s left to do is sit back and let the machine do the work.
It’s not going to take long. The entire process takes approximately 4 minutes; however, this can vary based on the side of the artwork and the number of artworks you are attempting to apply simultaneously. The average design, on the other hand, takes little more than five minutes to complete. Most of the time is spent taking measurements and transferring those results to the artwork in the design software.
Recommended Attachments:
Rotary attachment is responsible for the etching of the cup. Two distinct attachments are used with the rotary device. These attachments are referred to as internal installation rotary attachments and external placement rotary attachments, depending on where they are installed.
The external installation consists of just hooking the unit into the laser engraving machine if one does not already exist. The internal installation refers to integrating the rotary attachment’s drive and power source into the box of the machine.
Frequently Asked Questions
What is the best engraver for Yeti Cups?
For etching Yeti Cups, we recommend using the ORTUR Laser Master 2.
Are Yeti’s a good investment?
Yetis are revered by many, and for a good reason: they are powerful. They can keep your drinks cold for hours, the ice intact, and the seltzer bubbly for several hours. Furthermore, the coating and overall size make them ideal for use during outdoor activities.
What is it about Yeti cups that makes them so unique?
Many lasers etched Yeti tumbler cups are dual vacuum insulated to keep drinks hot or cold. This indicates that they are excellent insulators. Depending on the model, they can keep ice cold for 1-2 days and hot drinks hot for 12+ hours. On the other hand, many other tumbler cups use the same insulation to keep cool or hot for the same reason.
Wrapping it Up
We hope you found our article on Yeti Cup engraving to be informative. In this article, we covered a great deal of ground, and we hope that you were able to take away some valuable information that will assist you in making the best decision possible for your project.
