Several materials can be laser engraved or laser cut, but acrylic laser engraving is the medium of choice for most laser engraving lovers due to its multiple advantages. For starters, acrylic maintains its fresh scent and appearance at all times.
An acrylic sheet is a clear, transparent thermoplastic frequently used as a shatter-resistant substitute for glass. Acrylic is often referred to by its chemical name, poly acetate (methyl methacrylate).
It also cuts cleanly, making it an excellent material to work with a laser. Furthermore, it is reasonably priced while maintaining a high-end appearance.
You can incorporate unique and outstanding elements into the acrylic substance-using engraving methods on acrylic material. It produces this outcome since a designer is capable of practically incorporating any pattern, such as any light, complicated, or even meticulously made patterns, into their work.
Types of Acrylic:
Acrylic may be divided into two types: (XT) and (GS). Cast acrylic (XT) is created by pouring poly (methyl methacrylate) resin into a mold or onto a moving steel belt to make acrylic sheets.
Cast acrylic is great for laser engraving because it produces a frosted surface, ideal for acrylic laser engraving. XT is created by passing a (methyl methacrylate) polymer between steel molds, compressing the material to a sheet, and cutting it into pieces. During the laser cutting process, extruded acrylic yields a flame-polished edge.
What is Acrylic Laser Engraving?
Its ability to absorb specific wavelengths of light is what distinguishes acrylic from other materials. When subjected to a beam laser cutter, it acts like a sponge, soaking up all energy.
This implies that acrylic may generate stunning engravings even when used in conjunction with low-wattage lasers. You can laser acrylic on both the front and back of the piece of material. Whichever method you choose, you will have an enjoyable final product.
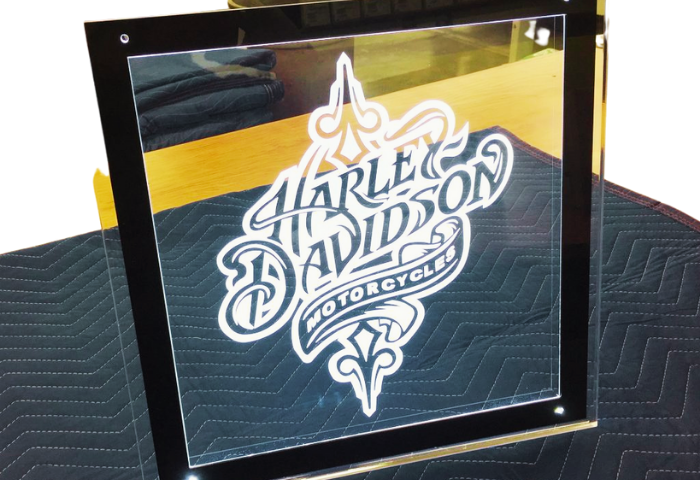
However, a fantastic approach to produce a “glance through” appearance on the front of the object is to engrave designs from behind the product. It provides the product a three-dimensional aspect that elevates its overall appearance to a higher degree.
For your text and images to read correctly from the front, you must have them inverted when printing on the backside of acrylic.
You may utilize the mirror effect in most graphic design tools, such as Vector illustrations and Adobe, to reverse the picture and lettering before starting the laser engraving acrylic process, which will save you time.
When imprinting on acrylic, it’s essential to determine multiple times and cut once, as the saying goes. This is a time-tested procedure used to prevent overpaying when engraving on valuable objects such as jewelry.
Try engraving on an acrylic sheet with a colored polyester mask to see whether your engraving abilities are up to the mark. Use a low power setting (approximately 5 percent) and a fast speed setting to see how fast you can go.
Only during this experimentation phase can the mask be cut. You can continue to the solid acrylic only after being confident that your design will turn out as intended.
Best Acrylic for Laser Engraving:
In your search for the best type of acrylic to utilize for your laser engraving work, you will come across two options: extrude and cast acrylic. However, there are additional considerations to take into account, such as the color of the acrylic.
Most people go for clear acrylic since it is popular and simple to deal with, and it is also inexpensive. If you’re looking for something different, consider a tinted hue such as crimson, gold, jade, or sapphire if you’re searching for something different.
Opaque colors are also extremely stunning. The colors black, white, blue, red, and brown are among the opaque alternatives widely accessible on the market these days.
You may also choose a mirrored accent, which is just regular acrylic that has been laminated with material on the top, bottom, or side to create a magnificent multicolored reflection and a distinguishing differentiation from the competition.
If you are willing to try new things, you may also match your acrylic with other things such as wood frames or accents, even metal, if you feel adventurous. The finished product will almost certainly be stunning.
Why Choose Laser Engraving for Acrylic?
Compared to other commonly used materials such as wood, acrylic demands a greater frequency of laser cutting due to its composition. The greater the frequency, the more uniformly the energy is distributed throughout the substance being worked on. In this way, the laser-cut acrylic edges are evenly melted, resulting in a glass-clear, flame-polished finish.
Below, we’ve outlined some of the most popular engraving techniques currently available.
Using Rotary Attachments:
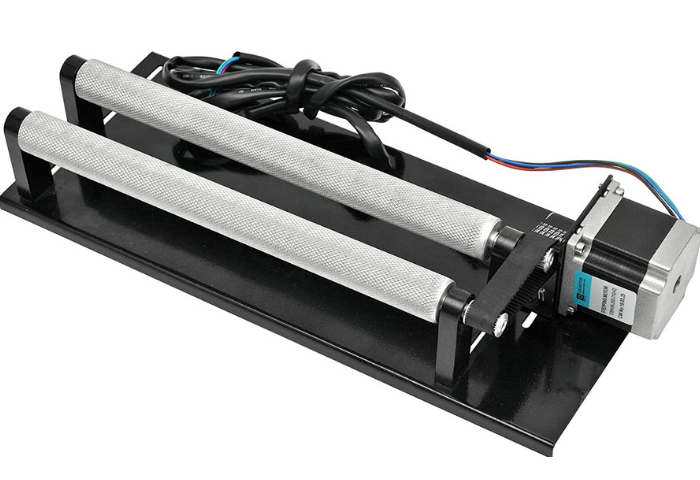
This approach is useful when you need to rotate a picture in preparation for slicing into an acrylic material; special cutters aid in completing in-depth cuts visible through the acrylic substance’s transparency.
- The correct geometry should be entered into the cutter for the finest cuts.
- Fix the proper clearance angle in the rotary engraving acrylic since this provides chip clearance and clear-cutting edges on the rotary engraving acrylic.
- Create a v-shape with the letter sets by grooving them together. This increases the beauty of acrylic.
- By following the suggestions below, you may change this procedure and obtain high-quality results.
- Increase the speed of the spindles while decreasing the rate of feed.
- Make use of a sharper cutter.
- A beveled edge may be achieved with the use of a tapered cutter.
Mirrored Reverse Side:
The process involves the creation of a foundation, as well as the use of cast acrylic to complete the engraving. The outcome of this approach is a mirror etching that is visible behind the cast acrylic.
Let’s break down this approach into a few steps.
- Prepare the design and insert it into the laser engraver’s chamber.
- The final picture within the cast acrylic is maintained in the laser engraver until it is needed again. This is the first phase in the engraver’s process. It will activate the laser machine, which will allow it to begin engraving.
- Remove the product and flip it over to the other side.
- Later on, the artist engraves a similar picture in the cast acrylic that he has created. The opposite face of the cast acrylic is transformed into a clear-cut picture due to this procedure.
- Remove the Engraved Result from the equation.
- Removing the product from the laser engraving machine once each engraving process is completed is important.
Acrylic Laser Cutting:
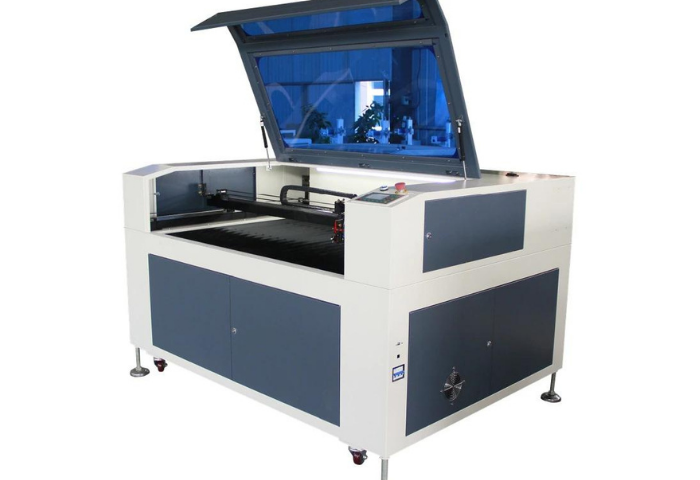
This technique is referred to as an acrylic laser cutter, and it is a very easy procedure. First, you must remove the paper mask attached to the acrylic that is included with it.
During the manufacturing and processing of acrylic, this film is utilized to preserve the polished surfaces of the acrylic.
A paper mask aids in protecting the material and the completion of a clean cut.
Following that, you’ll want to lift your acrylic sheet to a level where it won’t come into contact with the cutting table.
The appearance of grid lines on the material after engraving will be significantly reduced due to reducing backside reflection. Acrylic has a high flammability rating.
Because of this, you should maintain a careful check on the cutting process to avoid any mishaps from occurring.
When you are finished cutting, a metal table thickness of 10mm ensures that each of the parts you have processed will remain in its original place. The laser energy does not pass through the metal table; rather, it is reflected off of it.
Unfortunately, this heat is directed to the bottom side of the material, resulting in deformation and pitting.
Therefore, it is a good idea to establish an air space between the worktable and the acrylic to disperse the heat generated and, as a result, enhance the cut quality. This may be accomplished with the aid of a cutting table.
If you choose the former, be sure to install a backup plate underneath your material as a precaution. This not only provides a clean cut, but it also helps to keep your work table cleaner. Vector cutting tables are also available for this purpose, and they may be quite useful if you plan on cutting a large amount of material with your laser.
To achieve the greatest results, run your engraver at high power and a slow-speed setting. The slow cutting process guarantees that the laser beam melts the edges of the material properly, resulting in a polished appearance.
Depending on how thick your material is and how powerful the laser is set, you will need to make several passes with the laser to produce a clean cut. Effectively speaking, more power cuts deeper and more quickly than lower power, and vice versa. If you want to make several passes, make sure to maintain the proper laser focus.
For example, suppose you concentrate the laser on the material the first time you cut it. In that case, the material may be out of focus during the second pass of the laser cutting operation.
A beam that is out of focus results in a bad cut after the process. Fortunately, most laser equipment on the market now is equipped with an auto-focus option that completely removes this difficulty.
Factors to Consider Before Laser Engraving Acrylic:
Temperature: The temperature must be selected carefully to get the desired quality in the finished product. When configuring the laser, make sure you use the proper temperature to avoid any burning.
Correct material: When you want a certain effect, make use of the appropriate acrylic substance. For example, cast acrylics can provide a frosting white finish when a white icing effect is desired.
Your protection: Any usage of lasers necessitates the implementation of additional safety precautions. When using the laser, make sure you wear all of your safety gear at all times.
Common Acrylic Engraving Issues:
- The mirrored reverse side step requires more time to complete than the other options.
- The paint veneer process also necessitates a significant amount of time.
- To produce the greatest goods, the rotary method must adhere to certain guidelines in the manufacturing environment.
Conclusion:
With your laser engraver, you can produce a multitude of personalized goods. Getting the greatest results from the actual engraving and cutting of the acrylic is the key to getting the best outcomes.
It is always good to have a sample of the material to test before laser engraving on the final product. Making so many mistakes that you wind up squandering all of your acrylic sheets is the very last factor you want to happen to you.