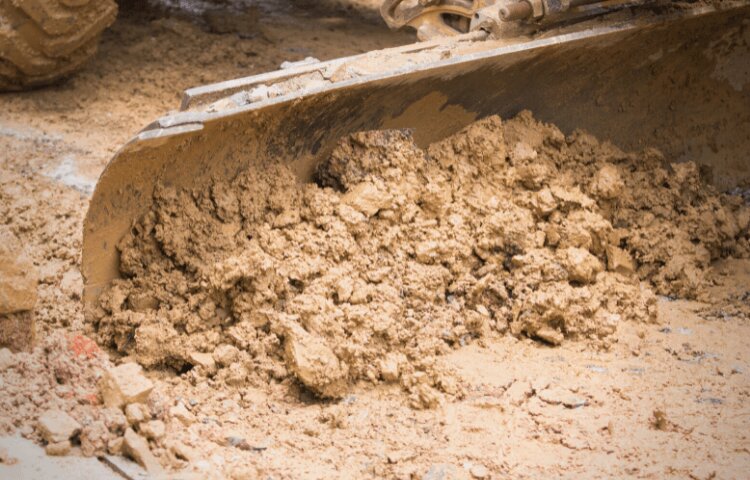
Grading is perhaps the most important step in any construction project. Whether you are constructing a new building or simply renovating a previous structure, grading and leveling is the first step. However, grading can be very complex if you don’t use appropriate land grading techniques.
In this regard, a laser level for grading can ease the job for you by providing precise data in minimum time. So, how to use a laser level for grading? This article will provide a detailed guide about the process and basic principles of construction grading.
What is Grading?

Grading in the construction field refers to the process of aligning the ground levels to match your requirements. Usually, the data from the laser level for yard grading is required for foundation works.
A properly graded ground ensures proper water flowing away from the structure and prevents the water from standing in the foundation or near the structure. The ASCI. ISO and British codes dictate that the ground should be well-graded prior to starting any construction project.
Similarly, existing foundations can be improved by grading the existing water drainage system. In most cases, grading can extend the structure’s lifespan by up to 50-years by restricting water penetration into the foundation. So, it won’t be wrong to say that proper grading is an important step towards safe construction.
What Type of Laser Level Works Best for Grading?
A laser level is as important for modern engineers as a stethoscope for doctors. Lasers are widely used in various fields of civil engineering such as land survey, foundation engineering, structure engineering, constructing topography, and measurement. In this regard, four types of laser levels are available: Dot laser, line laser, rotary laser, and all-purpose laser (total station).
However, you can only use a rotary laser level or a total station for grading or land survey. A dot laser only shoots a single dot on the surface that may be invisible in the field. Similarly, the line laser level shoots a thin line either vertically or horizontally. You can use the line laser on a painted wall, but it is impractical in the field.
That being said, either a rotary laser or a total station seems like the right choice for different land grading techniques. It is because you need such a device that can shoot laser beams 360-degrees from a single station.
Moreover, it requires at least two workers to measure the ground topography at different points on the ground. In any case, the best rotary laser level for grading can help you in agricultural survey, land survey, preparing farmland, and leveling for building construction.
Why Should You Use a Laser Level to Shoot Grade?
Proper grading helps you get an idea of the current land condition and the changes you need to make before starting the construction. So, it is important to know the precise values for each point for a successful project. Engineers have been using various tools and techniques like chains and auto-levels to get the data.
However, there is still some chance of machine or human error in the data. On the contrary, accuracy is highly important in surveying and other construction tasks. So, using a laser level for grading is a modern solution that offers highly accurate data without wasting any energy and time.
Moreover, chainage and manual leveling require multiple persons on the job, and tons of data calculation is a big part of it. The best rotary laser level for grading provides highly accurate data in excel format that you can easily convert into workable data graphs. So, laser transit for grading is the best way to measure and optimize the land conditions according to the type of construction.
Required Things for Grade Level Construction:
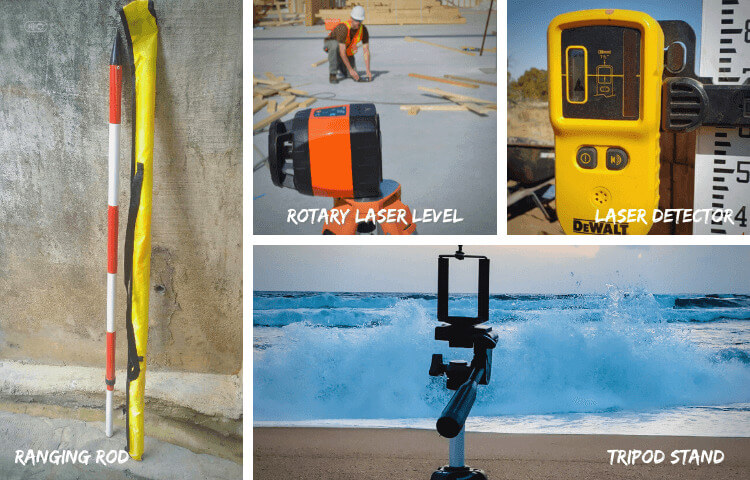
- Rotary laser level or total station.
- Tripod stand.
- Laser detector.
- Grade rod (ranging rod).
How To Use a Laser Level for Grading?
The laser level greatly eases the grading process. However, the whole process consists of 4-steps that you must follow for accurate readings. Here’s how:
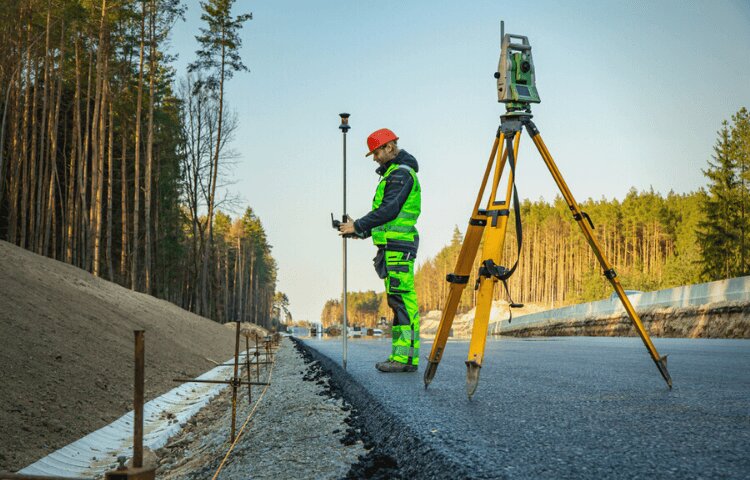
1. Setup the Station:

Construction-grade tripods are very different from camera tripods. The tripod’s stability and alignment greatly affect the accuracy and reliability of the data. Therefore, it is important that the setup is done with great care.
- Select a firm and stable area as your benchmark station.
- Open the tripod’s legs to such a length that you can view in the rotary level without bending your back.
- Gently insert the sharp ends of the tripod into the ground to fix its position.
- It is very important that the tripod’s alignment is perpendicular to the ground. Most tripod stands come with a stability bubble on them.
- The bubble should always be in the center of the circle, or else the data will be inaccurate.
How to Balance the Tripod?

- Fix two legs of the tripod in the ground while keeping the third one in your hand.
- Slowly move the leg back or forth while monitoring the stability bubble.
- If the bubble doesn’t come in the center, you can always adjust the leg’s length as you need.
- Fix the third leg in the ground while keeping the bubble in the center of the circle, and don’t move the tripod from this point on.
Fix the Laser Level:
- The next step is to carefully place the rotary laser level on the tripod without messing up the balancing bubble.
- Unscrew the attaching section, place the laser level on the tripod, and screw it tightly so that it doesn’t move from its position.
- Lastly, it is best to check the balancing bubble after setting up to ensure that the tripod didn’t move during the setup.
2. Setup the Laser Level:
- Turn on the laser level and create a new job from the main menu.
- Ask your assistant to move the grading rod to the area of your desired height.
- Look in the laser level’s telescope and try to shoot the laser beam at the center of the rod.
- Once you hear the beep sound, save this height as your initial height or benchmark.
3. Start Grading:
- Once the benchmark is added to the system, you can start the grading process.
- Ask the assistant to move to different locations or stations along with the grading rod (ranging rod).
- Follow the same steps as above to locate the laser detector of the ranging rod from the laser level or total station.
- You will hear a constant beeping sound when the laser beam hits the center of the rod.
- You can slightly adjust the laser beam by shifting the laser focus both vertically and horizontally.
- It is important to save each data reading before moving the ranging rod to the next station.
- Also, mark each scanned spot with paint or a tag for future reference.
- The best self-leveling lasers have a dial-in mode that automatically adjusts the beam according to the grading height. You can dig the surface till you hear a continuous beeping sound.
4. Calculate the Data:
- When the scanning is complete, it is time to start the calculations.
- Import the saved data to your laptop using a USB flash drive for your particular job.
- Open the data file in Excel or Google Spreadsheet.
- Create a line chart showing the benchmark line or ground level and the reduced level of all the points.
- The area above the benchmark line shows excavation, and the area below the benchmark line shows filling.
- You can also calculate the total area for cut and fill either manually or using an AutoCAD extension.
Alternative to Rotary Laser Level:
You can also use an automatic Altimeter for grading the ground. The ZIPLEVEL PRO-2000 is one such instrument that further eases your job. It adjusts the grading height automatically to match the input data.
Moreover, the output data is recorded in numbers that you can export to your laptop using a USB flash drive. In short, the Altimeter reduces the time and labor required to complete a grading job.
Frequently Asked Questions:
How to use a basic rotary laser level for grading?
A basic rotary laser level requires a ranging rod, an assistant, a tripod, and a laser detector. You can easily grade an area using any rotary laser level by following the steps as stated in this article.
How does a laser level work?
A laser level is a device that shoots a laser beam in a straight line. You can use a laser detector to measure the accurate distance and elevation of any point on the ground.
What is the benefit of grading?
Grading is an important part of any construction project. It helps optimize the ground to restrict the movement of water towards the structure. Moreover, it is also important for setting pipelines, foundation works, new constructions, and renovation of existing structures.
Conclusion:
Grading is perhaps the most important factor that determines the success of any construction project. All building codes globally dictate that grading should be done prior to starting any construction project.
A properly graded ground stabilizes the structure and prevents water damage, thus increasing the service life of the building. Nowadays, engineers use a rotary laser level for grading the grounds. Therefore, this article provides a detailed guide on how to use a laser level for grading; I hope it is helpful for you.

