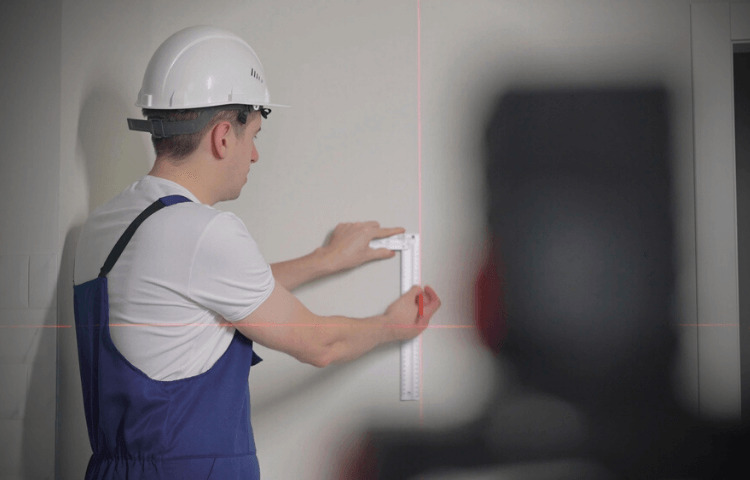
When painting stripes, it might be helpful to use a laser level: Walls that have stripes on them, either up and down the wall or just along the top, may make for attractive accents.
They have also gained popularity for use on the walls of home offices and recreation spaces, in addition to nurseries and the bedrooms of young children.
It is a fantastic method for bringing new life into an area. Because they are so universally flattering, stripes are consistently one of the most popular choices for wall design. With the assistance of the laser level, let’s look at the process of creating a lovely striped wall.
Installing Stripes on a Wall by using a Laser Level:
If you don’t want to feel like a failure as a do-it-yourself and don’t want to spend the rest of your life hunching in one way, you should make sure that the stripes you paint while using a laser level are exactly straight.
No one ever uses a yardstick or any other kind of straight edge to make an effort at marking off lines for stripes. On the other hand, the spirit level has been widely used for many years. On the other hand, using a laser level is not currently considered the best option.
Things you will Need:
You must use a laser level to guarantee everything is on the same plane.
- You will need something more than simply a laser point generator, and that something is a laser level. However, line levels or mid-range models will function. You are not required to purchase a more expensive and high-end rotary laser level; nevertheless, doing so would be beneficial if you want to do many other jobs in the future.
- The paint, as one could expect.
- Tools like rollers and brushers
- The drop cloth used by painters.
- Tape used for painting.
- Pencil, partly sharpened.
- Tape Measure.
- Ladder.
Steps on Painting Stripes:
Step 1: Planning

It is essential to have a distinct image of your target in your mind at all times, in addition to potentially having a rough draft of it drawn up somewhere. This may appear to be something that should go without saying.
The act of painting stripes with a laser level will not, by itself, be of any use to the conception process. You must have information on the width of the stripes, the distance between each one, etc.
The effect of vertical stripes is to make the ceiling appear taller; horizontal stripes lend an air of playfulness to the space, and broad stripes are an excellent way to prevent a wall from appearing too plain.
Step 2: Take measurements of the Wall
After you have painted the base color to cover the wall and let it dry for twenty-four hours, you are ready to go on to the next step. Now that you have all your materials in hand and the drop cloth, it is time to measure.
The level needs to be secure and stable before you can proceed. One of the available choices is to place it on the wall, which is very feasible. You may elect to utilize a tripod instead. It’s possible that you don’t have a cross-beam level with you.
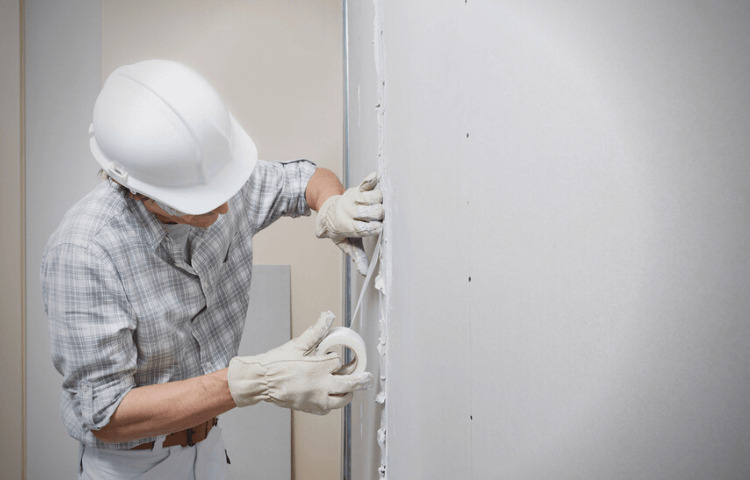
Step 3: Prepping Up

It would help if you got the area that you are going to paint ready by removing any switch covers, plugging any holes or nail holes in the wall, and taping off any moldings.
To prevent damage to your flooring, use drop cloths. Move any furniture that could be in the way away from the wall, and keep a damp paper towel handy to quickly remove any paint that might get on other surfaces.
Step 4: Applying Paint on the Base

If you paint your stripes with two different colors, make things simpler for yourself by picking one of those colors to use for painting the foundation. You will do it for just one color when you go to the following process stage, which involves marking and measuring. At the very least, give your foundation a full day to dry out before moving on to the next stage.
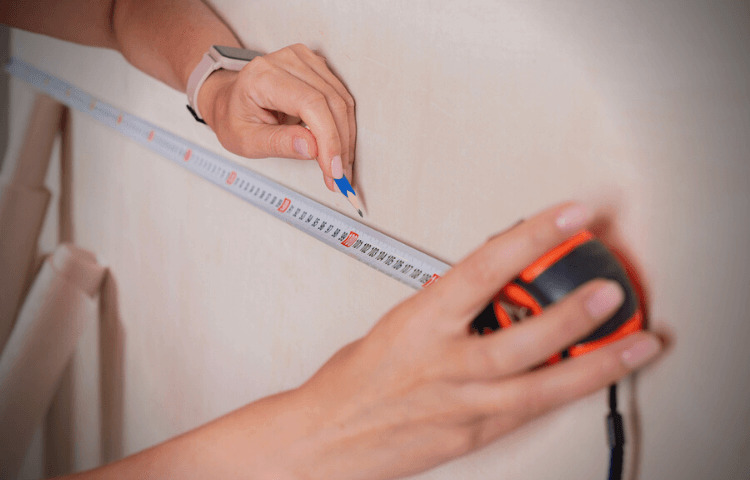
Step 5: Taking Measurements and Making Marks on the Wall
Utilizing a pencil, make a mark denoting the measurement of each stripe. By marking it with a few pieces of tape, you can track which stripe will be painted and which one will remain the basic color. This is an important step to remember.
You will need to measure the length and width of your wall before deciding how many stripes you want to paint on it and how wide each stripe will be. Choosing an odd number of items for your space is a smart idea since it will create a more attractive appearance.
Take into account the height of the wall while planning horizontal stripes. Measure the wall’s width if you want vertical stripes.
If you obtain a measurement that is too difficult to record precisely on the wall, add the additional inches to the final stripe to obtain a round figure for each stripe.
Install the laser level on a tripod, and aim the laser line to be projected directly onto the wall. Alternatively, you might use painter’s tape to assist you in fixing the level of the wall. It depends on the specific model of laser level you are utilizing.
After you have adjusted the level, the next step is to let the laser show you where to place the tape. Check to see that you have the tape adhered to properly.
The tape used for the top of each horizontal stripe will be placed above the laser, and the tape used for the bottom of each horizontal stripe will be placed below the line.
When there are vertical stripes, the “before” and “after” positions correspond to the first and second lines, respectively.
Step 6: Roll Tape
Taping off the regions where the stripe will be applied allows you to construct those areas now. Rolling the tape below and above the laser line is how you create a horizontal stripe; of course, you must paint the area between the two rolls of tape.
Making broad stripes requires two laser lines: one to mark off the top and one to mark off the bottom. You may have small pencil markings instructing you on the width of these stripes and the place where those pencil marks will be where the laser line goes.
Step 7: Apply some Paint to that Stripe
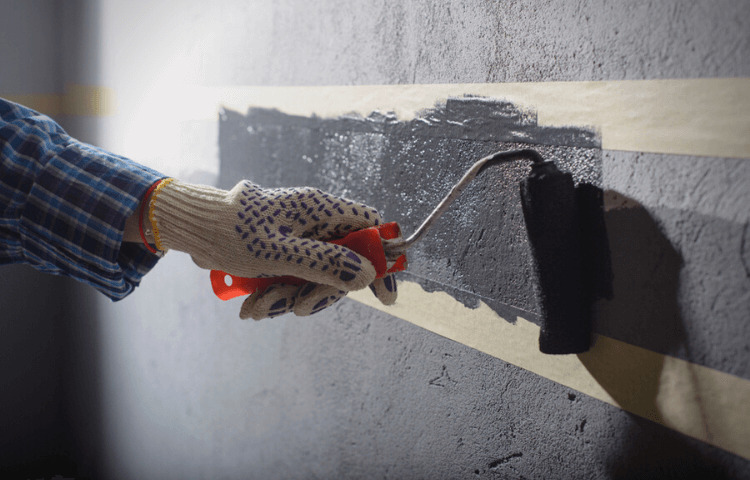
Paint the stripe in an even manner, either with a narrow brush (here’s a helpful hint: you can opt to measure the width of your paintbrush and make your thinner stripes the same width so that you can take one swipe only with a brush) or with a roller for wider stripes.
The tape must be removed carefully from the wall as soon as each stripe is painted since failure will cause the tape to get adhered to the wall. Because the tape will still be wet, exercise extreme caution to avoid smudging it.
Frequently Asked Questions:
How to divide a wall with two paint colors horizontally?
To begin, measure the wall and locate the exact center of the structure. Mark the spot where the center is once you’ve found it with a pencil or a piece of tape. After that, select one of the paint colors and begin painting the wall working your way down from the top to the middle mark. Once you have reached the middle, you must pause and change to the opposite color. Carry on painting the remainder of the wall in the same fashion as before. Any area may benefit from adding interest by simply painting horizontal stripes on the walls.
How to Tape Straight Lines for Painting Stripes?
If you’re painting stripes on a wall, the first step is to tape off the lines. This will ensure that your lines are crisp and clean. To do this, start by Measuring the width of the area you want to stripe. Then, draw a line across the wall at the desired height using a level. Next, use painter’s tape to tape off the line. Start in one corner and apply pressure as you adhere the tape to the wall. Continue applying pressure as you smoothly move along the line.
Once the entire line is taped off, use a sharp utility knife to cut through the tape along the line. Be sure to cut straight so that your lines are clean. Now you’re ready to paint! Remove the painter’s tape when you’re finished, and enjoy your crisp, clean lines.
How to measure a straight line on the wall?
If you’re using a ruler or measuring tape, hold the ruler or measuring tape up to the wall and mark where the line meets the edge of the Ruler or measuring tape. Then, measure from that mark to the end of the line. If you’re using a level, place the level against the wall and mark where the line meets the edge of the level. Then, measure from that mark to the end of the line.
Conclusion:
It might be challenging to paint stripes on the walls, but it’s not impossible. You will never have to scratch your head again about how to tape straight lines for painting stripes when you have laser levels on hand. You may give your space a little more personality by painting it in stripes, but make sure to use painter’s tape with a laser level.


