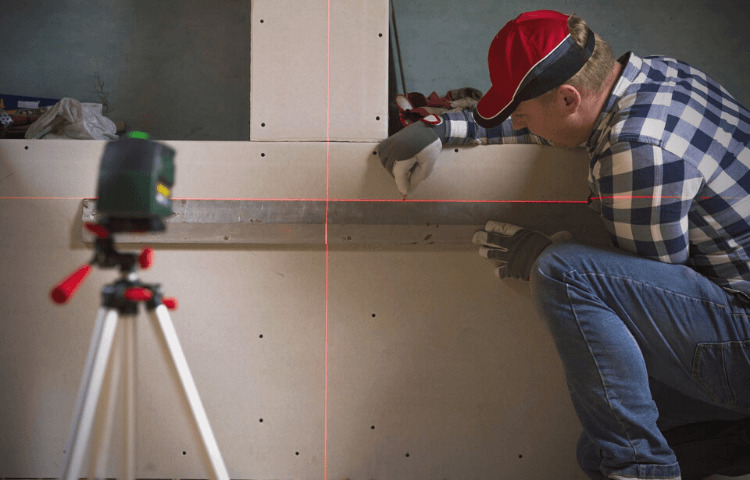
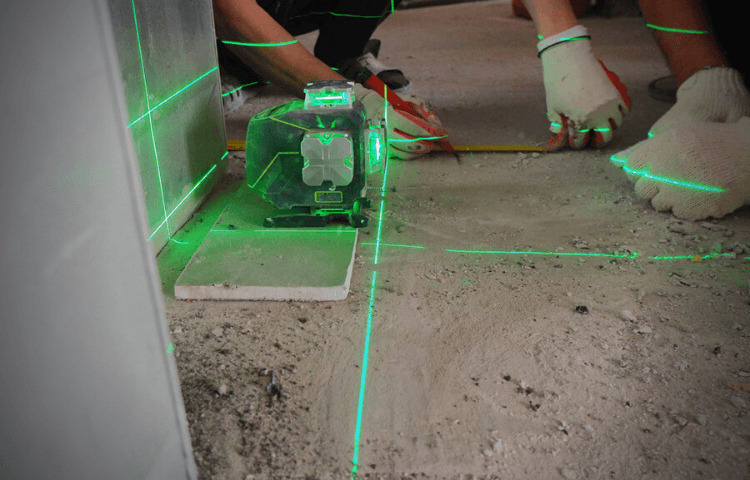
A rotating laser level is a beneficial instrument that carpenters may use in the building industry to assist them in leveling their projects by the design estimations. With this tool, construction workers can measure the levels more accurately from wall to ceiling or even from the floor to the top.
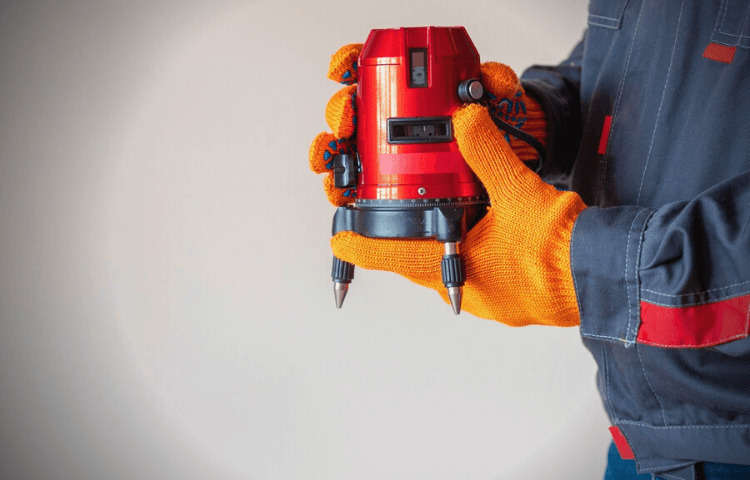
Purchasing your rotary laser level can be a wise investment; however, you will need to be familiar with calibrating your level if the factory’s default calibration differs from the standards you use in your work.
Calibration can be performed by comparing the level to a known standard. It is also essential to re-calibrate your rotary laser level if it has been dropped by accident or after it has been delivered to you by mail after you have ordered it online. So to correctly calibrate your rotary laser level, these are the steps you need to take.
What Does It Mean to Calibrate A Laser Level?
To calibrate a laser level means making adjustments to the device to ensure that it is accurate and produces a perfectly level line. This may be accomplished by opening up the gadget and adjusting the pendulum located within, which is where the laser line emanates.
Some laser levels are equipped with self-calibration buttons. These buttons allow you to modify the position of the laser line by pushing them in either direction.
Every laser level will give you an accuracy rating, and most models have an accuracy value of around 1/16 of an inch. In the following phases, we will discuss how to assess the correctness of this statement.
Why is it Necessary for You to Calibrate?
It is essential to calibrate your laser regularly to ensure that it provides you with a line that is absolutely level every time.
When the tool is not being used, the laser level’s locking mechanism can be used to keep it secure. This ensures that the inner pendulum remains in its correct position.
If you do not secure the pendulum and if you are not cautious with the laser level (for instance, if it bounces about in the back of your pickup while you are traveling around), the momentum will bounce around within the device and get thrown off if you do not secure it. Therefore, before you move your laser level, ensure it is locked in place.
It is important to remember that a less expensive laser level will probably require more repeated calibrations than one that is more expensive. If you choose a less costly one, you may have to adjust the deck more frequently, which will require additional time and effort.
How should a Laser Level be Calibrated?
1. Ensure the Information is Correct:
You must begin by determining whether or not your laser is that inaccurate.
There are three distinct approaches that you might take to accomplish this goal. Pick the one that meets your requirements for accuracy while also being the most convenient.
The Initial Approach:
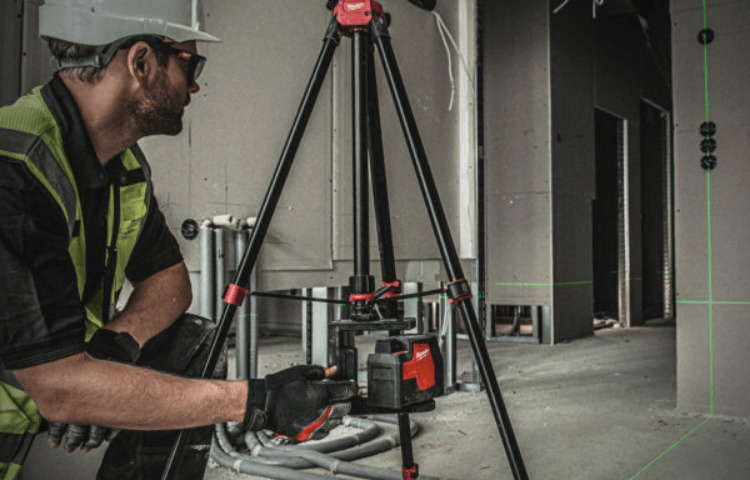
To begin, mount the laser level on the tripod so that it is level. Using a laser pointer to draw lines on a piece of wall tile is the first method, but only if you are sure that the tile was laid evenly in the first place.
This is likely the quickest option to verify because you can check both the Y-axis and the X-axis, but it also contains additional factors that might cause your findings to be erroneous.
The Second Approach:
One more approach involves shining the laser line onto the wall and marking two distinct locations using tape. Be sure to position the tape so that it is immediately underneath the line, and check to see that the laser line is in contact with the tape line.
Now, relocate the laser level to a different room section, hoist it up on the tripod, and align the laser line as precisely as possible on the second piece of tape. Check the initial marking one last time to see whether there is any deviation in the bar.
The Third Approach:
If you work in a confined area and do not have the freedom to maneuver the laser level, this could be a valuable approach to confirm the measurements’ accuracy. As in the previous step, position the laser level to face a wall at least 20 feet away.
Put some tape on a piece of paper and affix it to the wall, then make a mark indicating where the line is shining. A straightedge or ruler may assist in ensuring that everything is entirely straight.
After that, turn the laser level to 180 degrees while maintaining the same focus point with the light. If your laser includes a Y axis, you can mark an additional line by rotating the laser 90 degrees. Take note of the deviations that exist between the lines.
It is time to calibrate the level when the line deviates from the mark by more than the tolerance range specified in the user handbook for the level’s accuracy.
For instance, if the instructions for your laser level state that it has an accuracy of 1/16 of an inch, this indicates that the distance between the lines must be more than 1/16 of an inch for it to be necessary to calibrate the laser level.
To calibrate a laser level with a self-calibrating feature, you must push the up and down buttons per the instructions in the laser level’s handbook.
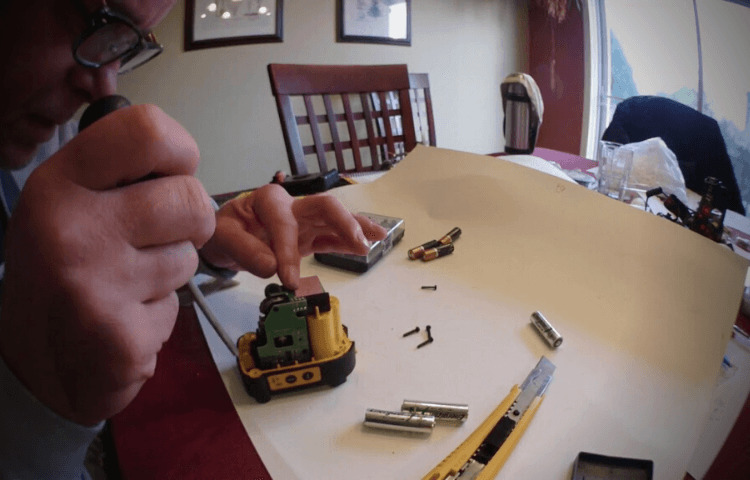
2. When Calibrating Manually, open up the Level and Inspect the Wires for Damage:
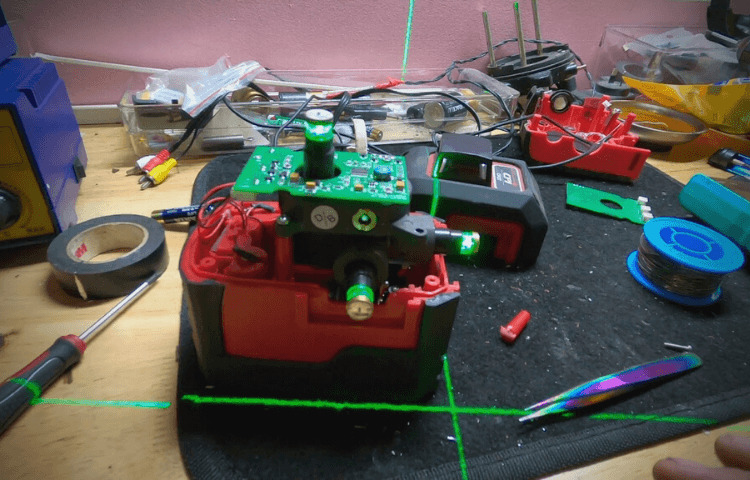
Take out the batteries, then open the level’s body by unscrewing all the corresponding fasteners. Please ensure the wires do not interfere with the pendulum’s movement by giving them a light tug with the screwdriver. If you do not adjust for this, your level line will be completely disrupted.
3. Make Any Necessary Adjustments to the Calibration Screws Inside the Body:
You are going to need a tiny screwdriver for this particular step. If your laser level has an X and Y axis, the pendulum’s position will be controlled by a pair of screws on either side of the device.
Put the laser level back on the tripod, and then replace the batteries; you will need the laser to be operational. First, you must ensure the pendulum is locked and remove one of the screws that keep it in place.
Unlock the door, move the pendulum in both directions a few times, and leave it alone. Keep an eye out to ensure that the line you measure on the wall is precisely straight with your level. After you have re-latched it, reinserted the screw, and unlocked it, check to see if the surface is now level.
4. Check and Recheck:
Throughout this process, you will want to ensure that the level is checked for levelness many times, both while the group’s main body is open and after it has been put back together. While testing for correctness, use the lines you have already drawn.
To confirm that the laser level line is glowing in the right places, repeat the method from step 1 and draw new lines to highlight the spots.
5. Success! Alternately, You Could Leave It Up to The Experts:
At this point, you should hopefully have successfully calibrated your level, and it should now be operating at an optimal level. If it doesn’t, though, you shouldn’t give up hope. There are trained experts available that can calibrate your level using more accurate measurements. These experts are not challenging to locate on the internet.
Frequently Asked Questions:
When should I perform a calibration check on my laser level?
It depends on the gentleness with which you operate your laser level. If the pendulum is not locked, you store it in an area where it gets knocked about, or you often drop it; you will need to verify the level’s accuracy at least once every six months. On the other hand, provided that you use it with care, you should be able to maintain its precision for up to a year. Always remember to lock the pendulum, and be sure to rotate it slowly and steadily.
Is it possible for one person to calibrate their laser level?
It is feasible for you to calibrate the laser level on your own, despite the process being a little bit complicated. You will need tape and potentially a pen and paper if the level you are adjusting can calibrate itself. If it does not calibrate itself, you will need a small screwdriver to undo the excellent screws found within the laser level.
Conclusion:
Laser measurement instruments are gaining popularity daily. Calibrating the laser level requires very few tools and is relatively straightforward. While working on a project, any expert should constantly calibrate the laser level they are using. You may have the most excellent laser level on the market. Still, if the laser is not calibrated correctly, even the slightest mistake might have disastrous effects on the finished product. Therefore, you should regularly calibrate your lasers.

