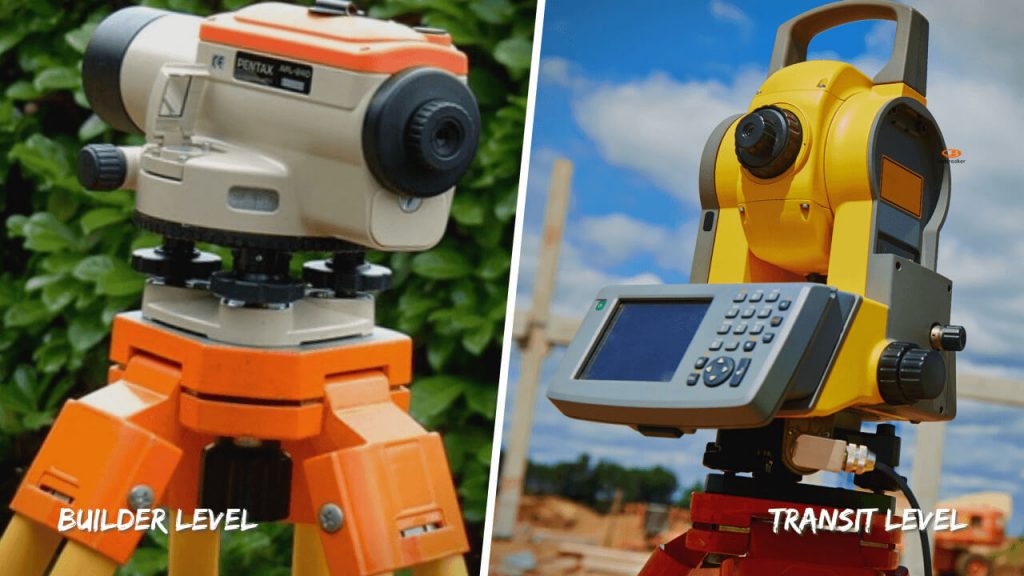
Construction projects involve multiple heavy-duty tools for measurement, alignment, and leveling. Among them, the builder and transit levels are the most commonly used devices in any construction site. If you ever get a chance to observe the two devices side-by-side, you will definitely feel confused. Both the devices are almost identical in function setup and have the same looks.
However, the main difference between a builders level vs. transit is that a builder’s level can only measure horizontal angles. In contrast, a transit level can measure in both horizontal and vertical planes. In this regard, the transit level is the best construction laser level for professionals. This article will provide detailed information about the builder’s levels vs. transit level to help you pick the right one for your needs.
What is a Builder’s Level?
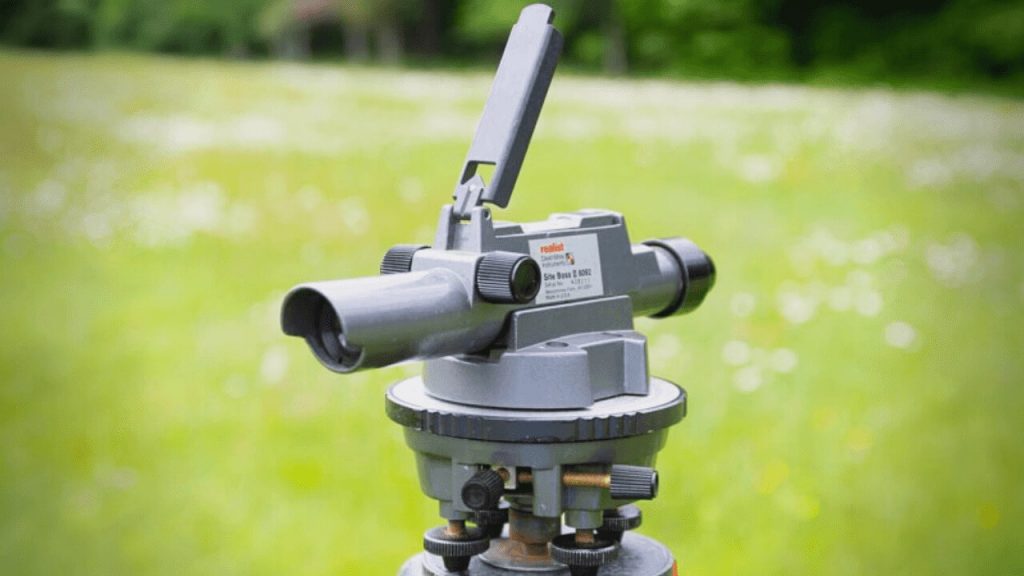
A builder’s level is an optical instrument used by the construction workers to check the elevation and set up level points. It is also known as a dumpy level because it basically dumps the view in a fixed plane, i.e., horizontally. Generally, the device is used for surveying and building projects. However, some home DIYers also use it for smaller projects.
Construction companies have used the builder’s level for several decades. However, it is replaced by modern devices like transit levels and total stations due to their multi-purpose functionalities. Still, the builder’s level is the best laser level for homeowners and small companies with a limited budget.
How to Use a Builder’s Level?
The first step in using a builder’s level is to adjust its balance. You must mount the telescope on a heavy-duty tripod stand to use it. Once mounted, observe the balancing bubble, and adjust the alignment accordingly. The bubble must always remain in the center of the circle for accurate readings. You can move the balancing bubble by shifting the tripod legs vertically and horizontally.
- If the bubble is away from your position, raise the tripod’s forward legs to bring the bubble back.
- If the bubble is close to you, either raise the back leg or shift the forward legs downwards.
- If the bubble is partially touching the circle, you can correct the level by tightening or loosening the screws under the mounting table.
- Once the device is leveled, i.e., the bubble is stable inside the circle, you can proceed with the process.
- Ask your assistant to shift the ranging rod to the targeted location and extend it according to the distance and elevation.
- Look into the eyepiece of the telescope and adjust the focus by turning the knob on the side of the eyepiece.
- You can also adjust the crosshair’s focus by turning the smaller knob.
- Rotate the device anywhere between 1 to 360 degrees till you spot the ranging rod.
- Tighten the rotating knob to fix the position and use the side knobs to adjust the crosshair at the ranging rog slowly.
- Note down the readings on a paper and use them to calculate the elevation and distance through the triangulation method.
What is a Transit Level?
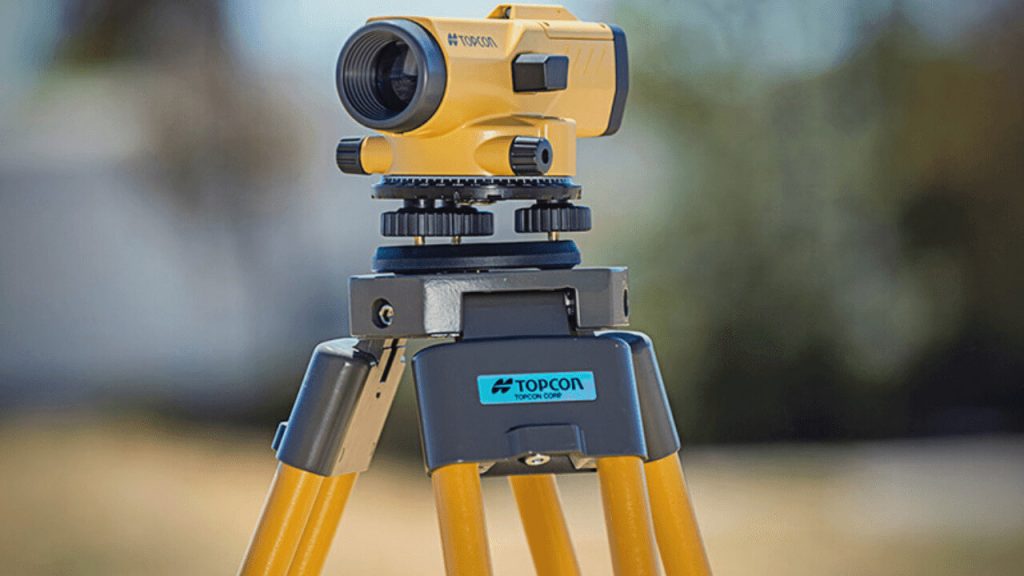
A transit level is a modern form of the builder’s level. It is also an optical device used to measure the elevation and set up vertical and horizontal level points in the field. However, it is a useful tool for construction projects as it allows a 45-degrees vertical motion along with the 360-degrees rotational motion. Usually, it is used by professionals for surveying, transformation, and marking elevation points in the field.
Nowadays, the transit level is used by Civil Engineering students for surveying courses and by small construction companies that can’t afford a total station. The working principle of a transit level is the same as a builder’s level. You must mount and balance it on a tripod stand for accurate readings. Another improvement in the transit level is the Alidade. It comprises of a telescope, leveling vial, spindle, and a circular reading device. The latest transit models use laser technology to accurately measure the reading as soon as it detects the laser detection rod. You can also find self-leveling laser transits in the market, but they are expensive.
How to Use a Transit Level?
The transit level also uses a telescope to locate the ranging rod like a builder’s level. Therefore, the device must be perfectly balanced on firm ground for accurate readings on the tripod stand. The leveling process is the same as a builder’s level except for self-leveling devices.
- In the case of a self-leveling device, place the tripod on a firm, dry surface.
- Mount the transit level on the tripod and turn it on. The device takes 1-2 minutes to level before it is ready to use.
- In case of an optical transit level, raise the tripod’s forward legs to bring the bubble back if the bubble is away from your position.
- If the bubble is close to you, either raise the back leg or shift the forward legs downwards.
- If the bubble is partially touching the circle, you can correct the level by tightening or loosening the screws under the mounting table.
- Stabilize the bubble inside the circle or give the device 1-2 minutes to self-level before you start measuring.
- Ask your assistant to shift the ranging rod to the targeted location and extend it according to the distance and elevation.
- Similarly, the transit laser levels require a laser detection rod to be moved to the targeted location.
- Look into the eyepiece of the telescope and adjust the focus by turning the knob on the side of the eyepiece.
- You can also adjust the crosshair’s focus by turning the smaller knob.
- Rotate the device anywhere between 1 to 360 degrees till you spot the assistant or the ranging rod.
- If you can’t see the readings in the eyepiece, you can also move the device vertically up to 45-degrees for a better view.
- Tighten the rotating and spindle knob to fix the position and use the side knobs to adjust the crosshair at the ranging rog slowly.
- Note down the readings on a paper and use them to calculate the elevation and distance by the triangulation method.
Comparison Table: Builders level Vs. Transit level
| Characteristics | Transit Level | Builder’s Level |
|---|---|---|
| Movement | It moves 360-degrees horizontally and 45-degrees vertically. | It only moves 360-degrees horizontally. |
| User-friendliness | Suitable for professionals and experienced people. | Simple device suitable for professionals and DIYers alike. |
| Parts | Two Parts: Level vial and Telescope | Four Parts: Level vial, Telescope, Vernier scale, and Alidade. |
| Cost | It is a professional device, so it is usually expensive. | Simple device with an affordable price tag. |
| Accuracy | Comparatively more accurate than a builder’s level but less accurate than a total station | It isn’t an accurate device according to modern standards. |
| Purpose | DIY projects, grading, leveling, etc. | Building, surveying, excavation, etc. |
| Technology | Optical telescope | Optical and some models use laser technology. |
Builders Level Vs. Transit Level:
A builder’s level is a less accurate, easy-to-use, and affordable optical leveling device. It uses a telescope and leveling vial to locate the ranging rod and measure its elevation. The device was used for construction projects; however, it is replaced by transit level or a total station in current projects. Still, the device is perfect for home DIYers who don’t want to spend hundreds of dollars on one product. The device can only rotate horizontally, thus limiting the viewing angle to X-axis. It is still regarded as the best device for marking level points on relatively smoother ground.
On the contrary, a transit level is a modern tool with several applications. It consists of four basic parts that provide more precise readings without any complications. It is widely used by companies and individuals who can’t afford a total station. The device can be moved both in X-axis and Y-axis, making it perfect for working on an uneven or sloppy surface. Due to the higher functionality and improved parts are usually more expensive than the best builder’s level. Moreover, you can also purchase an advanced transit device that provides the most accurate laser level readings.
Main Differences Between Builder Level and Transit:
| Transit Level | Builder’s Level |
|---|---|
| The device can only move 360-degrees horizontally. | The device can move 360-degrees horizontally and 45-degrees vertically. |
| It is easy to use by inexperienced and home users. | It is a little complex to operate and is only suitable for professionals. |
| The telescope needs to be leveled manually. | It comes in two variants: The optical telescope requires manual leveling. The laser telescope is self-leveling. |
| It has two parts, i.e., a telescope and a leveling vial | It has four parts, i.e., Level vial, Telescope, Vernier scale, and Alidade. |
| It is only used in small projects and home applications. | Professionals use it for surveying, grading, leveling, and building. |
Frequently Asked Questions:
How to use a builders level?
1. Mount the level on a tripod and stand it on firm ground.
2. Balance the level by adjusting the tripod legs and the rest table screws.
3. Move the ranging rod to the targeted location and spot it in the eyepiece.
4. Adjust the focus till the rod’s reading is visible.
5. Note the readings and use them to perform various calculations.
What is a transit level?
A transit level is an optical device used to measure the elevation and set up vertical and horizontal level points in the field. It works like a builder’s level, except for the telescope can be moved in both X-axis and Y-axis.
What is a level used for?
A level is used for various purposes that require accurate reading of elevation and assigning level points. Usually, it is used by construction professionals for surveying, grading, leveling, and building. Moreover, you can use the readings to establish a straight reference line, read angles, and measure distances.
Conclusion:
Construction projects require multiple professional tools for accurate results. In this regard, a level is the most important device for surveying, grading, and building. For this purpose, the builder’s level has been used for many decades till it was replaced by more accurate devices like transit levels and total stations.
Still, many people find it difficult to distinguish between a builder’s level vs. transit level. This article explains all the information you need to choose the best elevation measurement tool for your requirements.

