Fences may make life much simpler for you, and that is why you have to learn how to use a laser level to build fences. This is true regardless of whether you have bad neighbors or want to keep strangers from breaking in.
Now, the entire procedure might sound like a lot of work for you, and you might be wondering whether you shouldn’t simply give up and hire an expert instead. You won’t believe how enjoyable and simple it can be until you go through the steps outlined in this article, but trust us when we say that you will when you do so.
We have included everything you will require and instructions on constructing fences with the correct alignment in this section. So, don’t wait and get started.
One of the most important applications for laser levels is to provide your projects with a certain form that is straight-lined. Many people decorate their rooms. When creating a space, individuals frequently have to square their room.
This is done simultaneously. When it comes to this topic, most individuals do not understand how to use a laser level to square off a space. Using a laser level is one of the topics covered in this essay.
How Do You Properly Use A Laser Level to Properly Align Fence Posts?
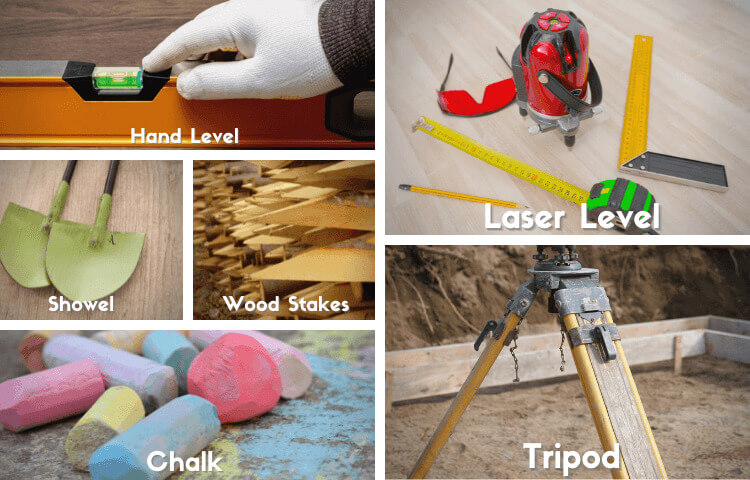
Without first assembling the necessary materials, it is impossible to do any project properly. If you are unsure of the materials required to construct a fence, you can rely on us to assist. If you follow this list, you won’t need to look for anything else because it has everything you need.
- Laser Level: Choose to carry out the task with a rotating laser level.
- Tripod for Use in Construction: During the process, the laser will be held in place using this.
- Laser Level Detector: Using the laser level assures that the reading will be level.
- Hand Level: A rough estimate of the distance or level can be obtained using a hand level.
- Chalk: After measuring everything, you may use chalk to outline the edges.
- Sensor Bracket: The sensor brackets will help maintain the integrity of the fence.
- Shovel: You will be able to drill holes for the fence’s foundation if you do this.
- Wood Stakes: One of the most important components needed to construct fences.
Important Things to Keep In Mind Before the Installation:
- Never focus the laser beam directly into your eyes or anybody else’s eyes since doing so can cause temporary visual distortions and harm.
- When working with the laser level, you must safeguard your eyes by wearing either specialist goggles or protective glasses.
A Step-By-Step Guide on How to Use a Laser Level to Align Fence Posts Properly:
Step 1: The First Thing You Need to Do Is Locate the Property Lines
Determining the boundaries of the property should be the very first and most important step taken before beginning the process of constructing a fence.
If the boundary line wasn’t drawn correctly, you could have to down the fence just a few days after installing it unless your neighbor permits you.
Step 2: Mark the Spot Where You Want to Begin

Put a chalk mark at the location where you want to begin. You can pick a corner of the targeted area or the terminus of the fence line when deciding where the beginning point will be.
The spot will be more apparent after it has been marked, leading to improved measurement.
Step 3: Determine a Level Strategy
Now, position a tripod on top of the designated spot, and then position a hand level on top of the tripod.
It is necessary to position the tripod in a level position to obtain the most accurate readings from the laser level. You will need to adjust the legs of the tripod until the hand level indicates that you have a level plane.
After establishing a level plane, you should remove the hand level from the tripod.
Step 4: Mount the Laser Level on the Tripod
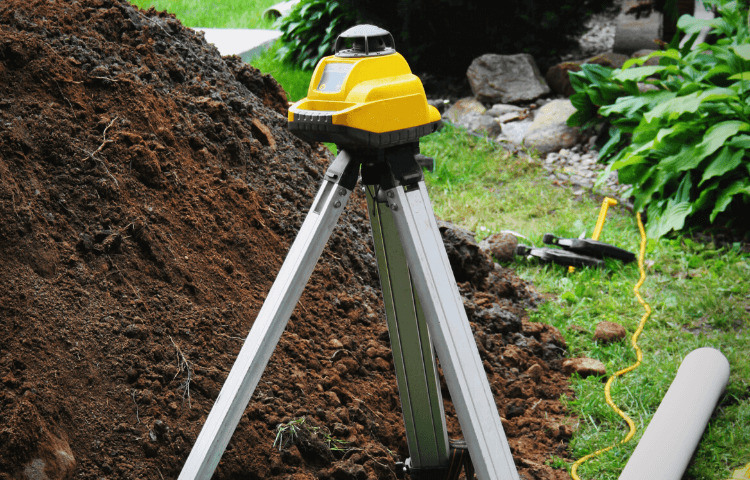
When the laser level is attached to the tripod in its upright position, the head of the laser level will seem to be tilted to the side.
Ensure that the laser level, once adjusted on the tripod, will produce a light beam on the ground that will point in the direction of the fence line.
Step 5: Adjust the Level of the Laser
To prevent the laser level from falling off the tripod or causing the tripod to topple over, ensure that the threaded bell assembly is securely tightened before adjusting it with the tripod.
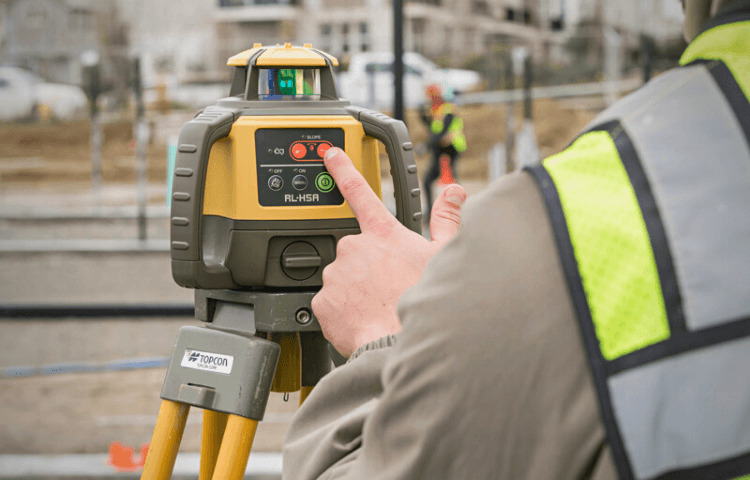
Step 6: Turn on the Laser Level
Before using the laser level, it is important to make sure you have read the instruction booklet that came with the equipment, especially if this will be the first time you have used it.
It would help if you first located the button corresponding to the model you utilize to activate the laser since each instrument has its own unique set of buttons with specific functions.
Step 7: Self-Leveling
If you are working with a gadget that can automatically level itself, you should give it some time to do so. In most cases, self-leveling does not take more than thirty seconds, and immediately after it is complete, the tool turns on a laser diode. Please make it so that the laser always rotates rather than stays in one place.
Step 8: Lock the Bracket
Next, take the laser level detector in your possession and make the necessary adjustments with the bracket. Lock the bracket together with the laser sensor onto a two-by-four wood stake, and then position the stake at the next location of the fence post that has been identified.
Step 9: Move the Stake
To fine-tune the precise location of the laser level detector, you will need to move the stake to the left and right.
When the laser hits the detector, it emits a beeping sound, and the device’s display shows a visible line.
Step 10: Use the Chalk to Make a Mark at the Location
Now, drive a wooden stake into the ground at the designated location. This stake marks the location of the subsequent fence post installed.
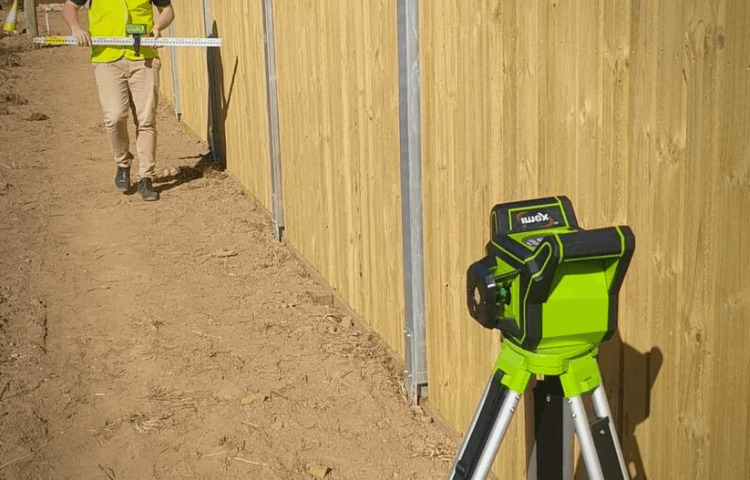
Step 11: Position Laser Level
After that, proceed to the next section of the fence and locate the next fence post. Repeat the previous steps to pinpoint the precise location of the next fence post. Position the laser level detector to point in the direction of the next post after it has been located.
Put the wooden stake in the location that was previously designated. Carry on with the technique until you have finished with the entirety of the fence location along its length.
Step 12: Finishing Up

After finishing all of the steps, you will need to use a shovel to set the fence posts in place at each point where they were staked. You ought to have a straight, aligned fence at the length that you desired in its place.
Frequently Asked Questions:
How should a laser level be used when installing a fence?
To construct fences, you will first need to use a tripod to set the laser level in a vertical position, and then you will need to use both a hand level and a laser level detector.
When constructing a fence, how can you ensure that the line is straight?
Utilizing a laser level is the most effective method for constructing a fence in a straight line. Be sure that the level is positioned correctly and that you maintain its equilibrium throughout the operation. In addition, be careful to record your dimensions to construct a straight line with ease.
How do you ensure that a fence post is exactly aligned?
Your fence posts will be properly aligned without you needing to put in a lot of extra effort or double-check anything if you follow all of the methods described in this article and have all of the required equipment
How exactly does one use a laser level to produce a straight line?
If you want to draw a straight line using a laser level, you must make sure that it is positioned correctly and securely fastened to the tripod. Please put it in a vertical position and check it with a hand level to ensure it stays put.
How do you use a laser level outdoors?
Because taking a laser level outside can affect how the laser line can be seen, it is recommended that you use levels designed for usage in natural environments. There are probably many of them, and it won’t be hard for you to find one
How do you laser level a bridge post?
Building a fence and using a laser level on a deck post are two remarkably similar processes. Ensure that you utilize the appropriate laser level and have all of the required supplies available.
Conclusion:
A correctly oriented and straight fence seems attractive, but it also guarantees a good boundary line, which may help reduce the amount of miscommunication between you and your neighbor.
Always check with the utility provider before installing the final fence posts to ensure that you won’t touch any live wires or other hazards by mistake.
When working with the laser level, paying equal attention to both tasks is important. Put on your protective gear to avoid getting hurt in any way you don’t want to.


