If you have ever used a 3D printer, you know that maintaining a clean print bed is necessary to produce high-quality prints. If the bed is not kept clean, your prints will have smudges and streaks, making the finished product seem unprofessional.
Are you having a hard time getting your 3d printer bed clean? It can be frustrating when the print quality isn’t what you expected. Luckily, there are a few things you can do to make it easier to clean.
This blog post will discuss some of the best methods for cleaning your 3d printer bed. We’ll also provide some tips on how to keep it clean in the future. So, if you’re ready to learn more, keep reading!
What is a 3D Printer Bed?
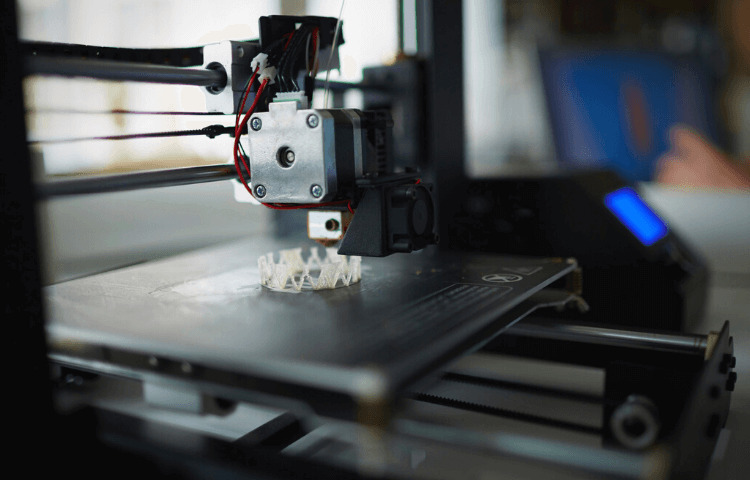
The bed of a 3D printer is the platform upon which the 3D item is constructed. Glass, metal, or plastic may have been used in its construction. During the 3D printing process, each subsequent layer adheres to the one underneath it in the bed.
If the bed of the 3D printer is not clean and level, you will run into problems with the initial printing layer, and the item will be created with warped layers. However, the object will print appropriately if the bed is clean and level.
Most 3D printers have an automated bed-leveling function that makes maintaining a level print bed simple. In addition, some 3D printers include heated beds that prevent the filament from being warped while the printer operates. After going through what a bed for a 3D printer is, let’s move on to the essential supplies for keeping it clean.
Why is it Important to Clean 3d Printer Bed?
Your model will be produced on the bed of the 3D printer, which acts as the basis for the model. After the printing process is over, there may be leftover filament left behind.
The bed gets dirty not only through regular use but also from the things in its environment, such as fingerprints, skin oil, and other grime. These impurities lower the quality of the prints you produce in the future and, over time, cause harm to the printing bed.
Skipping maintenance might produce irreparable damage in the long run and could only be fixed by replacing the printing bed.
3D Printer Cleaning Step by Step:
Things You Will Need:
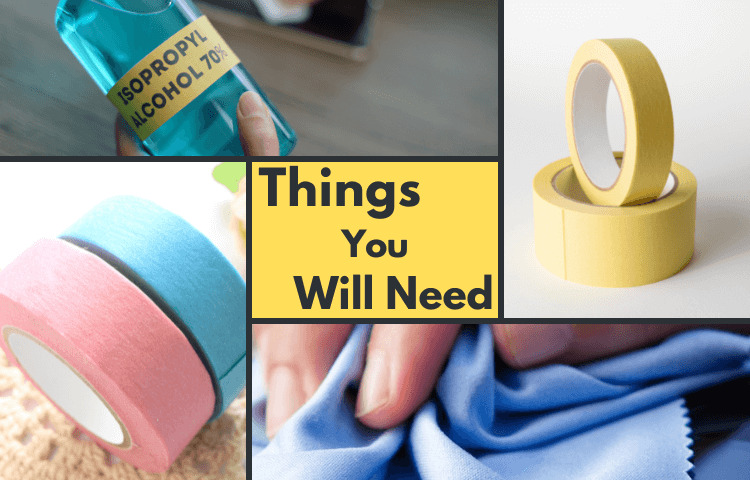
- Isopropyl alcohol (IPA).
- A lint-free cloth.
- Putty knife.
- Painters or masking tape.
Step 1: Safety First
A small amount of common sense will go a long way toward protecting you and the property you own when dealing with anything involving chemicals and electricity.
Never get chemicals mixed. You risk unintentionally producing compounds that are hazardous to your health and safety. Isopropyl alcohol and acetone should never be used together under any circumstances. It has a poisonous molecule known as peracetic acid, which can result in chemical burns or even worse.
You should never use any of these items in a tight location, and you should always make sure there is enough ventilation. Remember that acetone, like other types of alcohol, is highly flammable. One spark from the electronics or the heated bed is necessary to ignite a fire.
Step 2: Take Away Any Garbage or Dust That May Be on the Bed
Using a brush or a vacuum, you may eliminate any dirt or dust on the bed’s surface. You may use a brush to remove dirt sticking to the bed in clumps; however, a vacuum is more beneficial for situations where the material is spread out more uniformly throughout the bed.
If debris is piled up underneath the bed, you can detach it entirely, clear away anything that may have been stacked, and reattach it later.
To take the bed apart, you will need a screwdriver to loosen the four screws on each corner. However, keep in mind that after detaching the build plate, you will need to make any necessary adjustments to the bed’s level to ensure that certain materials, such as PLA, will adhere properly.
Sticking PLA to the bed can be challenging if the bed isn’t level enough. Additionally, use caution to avoid causing any harm to the bed.
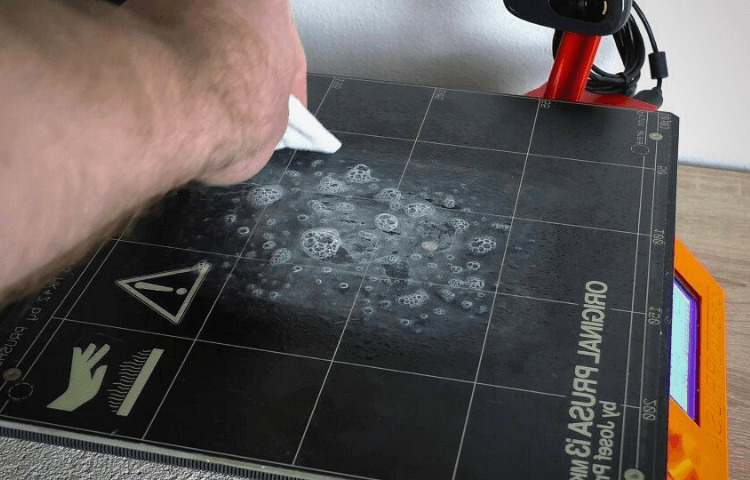
Step 3: Spray the Cleaner with Isopropyl Alcohol
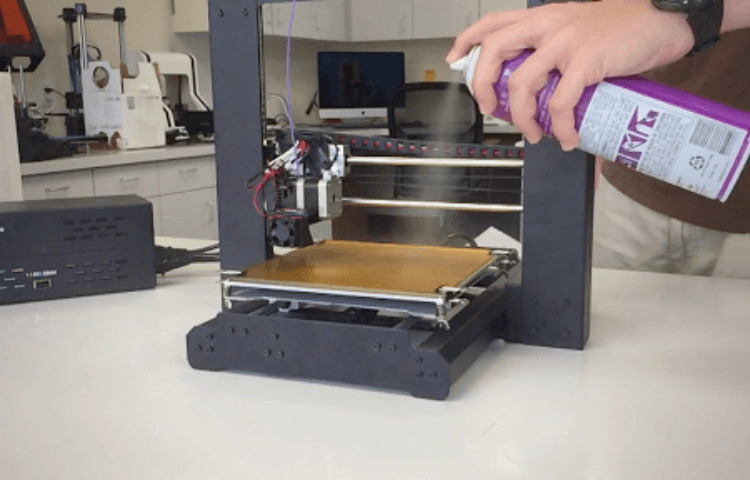
Take a rag that doesn’t collect lint and moisten it with some isopropyl alcohol. This task can also be accomplished with the help of a cotton swab or a pocket tissue.
To begin the cleaning process, start using a circular motion to wipe off the build plate’s whole surface carefully. This will remove any remaining oils and fingerprints from the build platform, leaving it clean and ready for the next print.
When you are finished, use a clean, dry cloth free of lint to wipe away any residue. Before utilizing the 3D printer again, it is imperative to check that the build plate has been let to dry out thoroughly. If water or alcohol remains on the surface, it might prevent the filament from sticking correctly, leading to poor print quality.
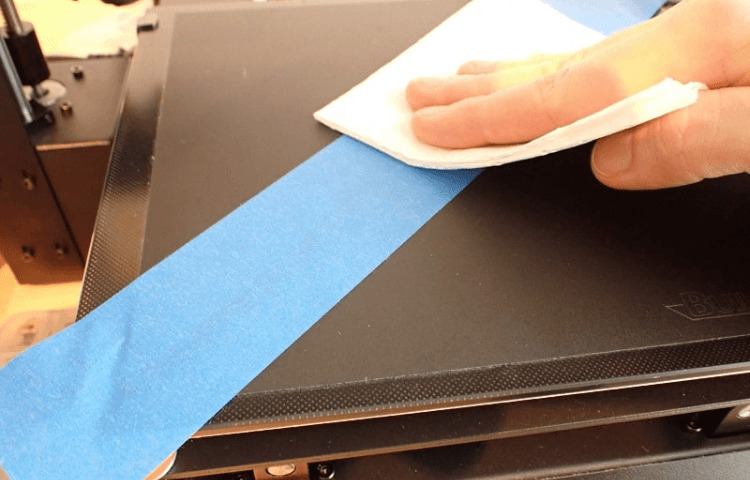
Step 4: Masking tape can be used for further Cleaning
However, 3D printers frequently leave behind a trail of surplus material during printing. This material can be challenging to remove, particularly from the hot build plate that forms the basis of the printed object because it is located underneath the thing being produced.
Even after cleaning using the two methods above, removing the surplus materials connected to the bed of the 3D printer can be difficult. This is where the masking tape comes into play now since it is necessary for completing the task.
The tape will stick to the construction plate and assist in lifting any residual bits of material that may be there. To make use of the tape, attach it to the construction plate before removing and discarding it.
You should be able to remove all of the extra material and keep your building plate clean and prepared for the following print job if you exercise a little bit of patience during the process.
Step 5: Cleanse the Bed
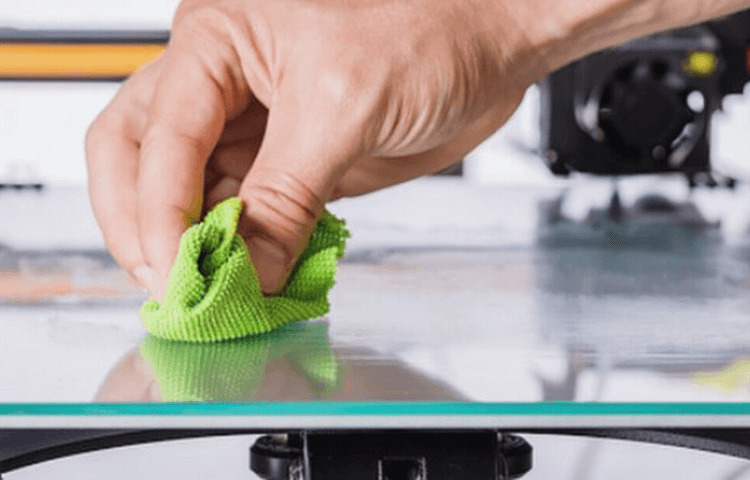
It is essential to use a dry towel to wash the surface of your 3D printer bed once you have finished cleaning it. The residue that may have been left behind after the cleaning procedure may be removed with this step.
Using a dry towel to wipe down the bed, one may assist in minimizing the buildup of static electricity, which can be harmful to delicate electrical components. In addition, it guarantees that the surface will be appropriately prepared for the subsequent printing process.
Tips on How to Clean the Bed of a 3D Printer:
A few additional helpful ideas to assist you in maintaining a clean printer bed are as follows:
- Isopropyl alcohol and cloth without lint should be used. Sandpaper and other similarly abrasive materials should be avoided since they can ruin the structure’s surface.
- If a residue is difficult to remove, even with alcohol and tape, you can try immersing the build plate in acetone for the night to see if it helps. However, ensure that there is adequate ventilation in the area and that you do not harm any of the other components of the printer.
- Before printing again, give the bed a thorough rinsing with water and let it dry completely.
- Maintain a consistent bed-making routine. This guarantees that your prints will always come out correctly and that your printer will remain functional for extended periods.
- Additionally, it is vital to clean the nozzle consistently. You may accomplish this task using a needle or a brass wire brush; however, you must not harm the aperture of the nozzle.
- The bed’s surface may be cleaned by sweeping it or wiping it down with a soft cloth or brush.
- After the print bed has been thoroughly cleaned, it is imperative that a skinny coating of adhesive be applied to it before anything is printed on it. This will assist in ensuring that your prints adhere correctly.
The Benefits of Keeping your 3D Printer Bed Clean:
It is essential to keep the bed of the 3D printer clean to produce flawless output. When beds aren’t kept clean, there are persistent challenges with layer adhesion, which lowers the overall quality of the prints.
Keeping the bed of the 3D printer in a usable condition for as long as possible not only extends the time it can be used but also reduces the likelihood that you will have to shell out more cash for quite pricey replacements. When it comes to printing, one of the most critical concerns is the quality of the initial layer and how well it adheres to the build plate.
Your models will print correctly and without any problems if the bed of your 3D printer is clean. Remember that you should maintain your printing bed by the manufacturer’s instructions, which might vary depending on the model and the materials it is made of.
Frequently Asked Questions:
How to clean 3d printer glass bed?
To clean the 3D printer glass bed, use a cloth to wipe off any debris or residual filament. If there is any build-up on the bed, you can use a mild detergent or isopropyl alcohol to clean it off.
How to remove prints from glass bed?
There are a few ways to remove prints from a glass bed. One way is to use acetone or nail polish remover. Another way is to use isopropyl alcohol.
How to level 3d printer bed?
There is no one-size-fits-all answer to this question, as the best way to level a 3D printer bed will vary depending on the specific printer model. However, some tips on how to level a 3D printer bed include checking the manual for your particular model, using a calibration sheet or platform, and using software tools to help you adjust the bed height.
Conclusion:
There are several different methods that you can use to clean your 3D printer bed. One popular way is to wipe the surface with a rag soaked in an alcohol-based cleaner, such as rubbing alcohol or isopropyl alcohol.
Alternatively, some people succeed in using specialized cleaning products designed specifically for 3D printing beds. These products often include surfactants and enzymes that help break up stubborn residue from previous prints.
Whatever method you choose, be sure to keep your 3D printer bed thoroughly cleaned regularly to ensure optimal print results. Happy printing!