Paintings and artwork, in particular, are very amazing, and they can breathe new life into any room. That being said, nothing quite like a bent frame that is not level, and it is much worse if you have numerous frames that are not level in respect to one another in the same scene.
It wouldn’t be incorrect to say that laser levels are useful in all situations and are thus universally applicable. You might use them for various tasks like hanging wallpaper, constructing a long shelf, constructing a cabinet or deck, or going to put up tile for your kitchen backsplash.
Also, consider using a laser level to hang pictures throughout your home. Do you have any reservations? Allow us to demonstrate how to use a laser level for hanging pictures on the wall.
Why Should You Use A Laser Level to Hang Pictures?
The solution to this question is rather straightforward. Laser levels may be put on any wall, and they are also available on tripods, allowing you to use either one of your hands to pound the nail into the wall with accuracy while using the other to hold the laser level.
Laser levels are also useful if you wish to orient your photographs in a specific direction. For instance, if you have different-sized frames that you want to hang side by side, you may use the laser level to mark the location on the wall where you want them to be hung to obtain the exact hanging position.
Even a simple laser level may assist you in completing a simple activity like putting up the line to line frames and aligning them with accuracy while also making the space appear lovely and cozy.
It is possible to purchase a laser level for various purposes, including mounting various things on the wall. As a result of the large number of various types that may be used based on your requirements, they can be purchased with more than one function included.
For optimal accuracy and alignment, the use of a tripod is essential when working with laser levels or construction side. Check out these affordable tripod options.
What is the Best Type of Laser Level to Use While Hanging Pictures?
In general, there are two sorts of laser levels that you may use for this work, and which one you select will depend on the reason for which you are using it.
To put it another way, if you are only hanging one painting on one wall (or numerous photos on the same wall), a simple line laser level that fires a single straight laser line will suffice.
For those who intend on hanging many pictures on various walls in the same room and need them all to be the same level, a rotating laser leveling that sends out a 360-degree laser line in all ways is the ideal option since it will strike all of the walls at once, enabling you to align all of the paintings in one fell swoop without needing to do much measurement will be the most convenient option.
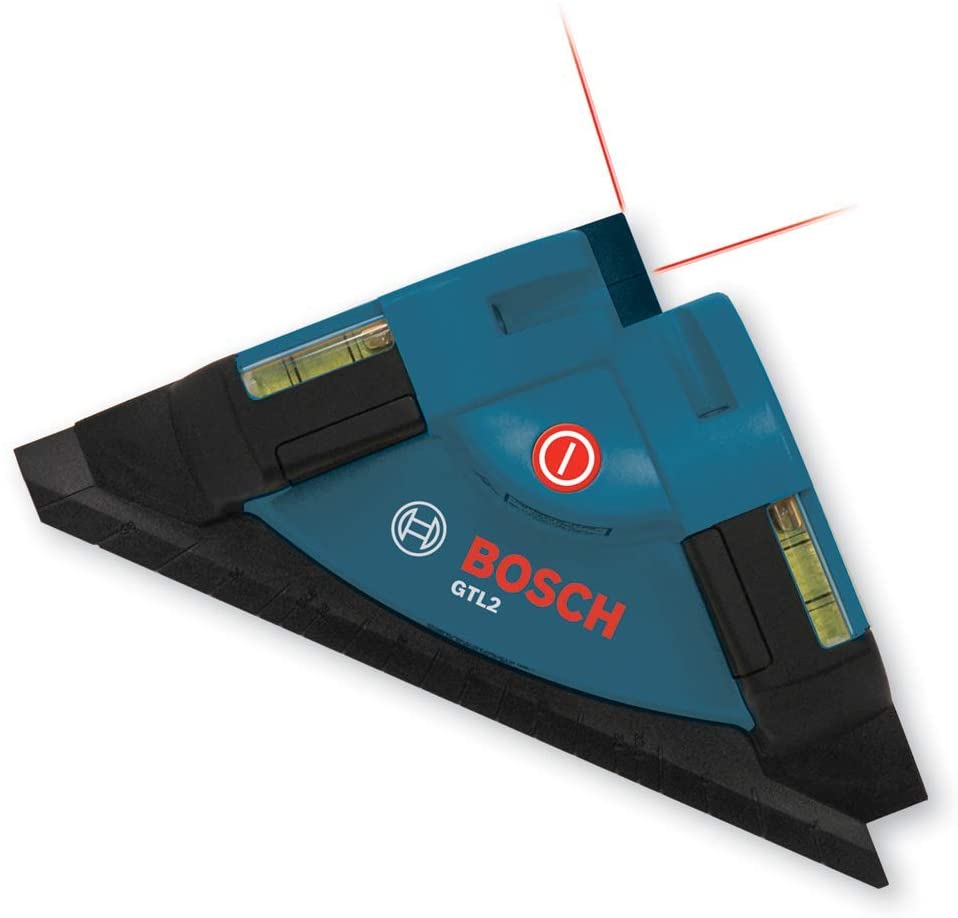
- Projects 30-ft horizontal and vertical chalk lines on any surface
- Bright, sharp, highly visible laser lines
- Features an alignment guide for 90° layout
- An easy-to-press push button
- Provides precision and accuracy up to ±1 2-in at 30-ft w
A Step-by-Step Guide to Hang Pictures:
So, the issue is, how do you put the photos on the wall using the laser level that you purchased? So, here is a step-by-step guide on how to breathe new life into that drab wall that you no longer would like to see empty:
Step 1: For this project, you will need to take measurements of the frame and the wall utilized. You want to make certain that everything is done correctly so that it looks good when you’re finished.
Step 2: Consider how high you want the frame to go. This is quite important. Not only do you not want it to be too high off the ground, where you will be unable to reach it, but you also do not want the youngsters to knock it off the wall accidentally.
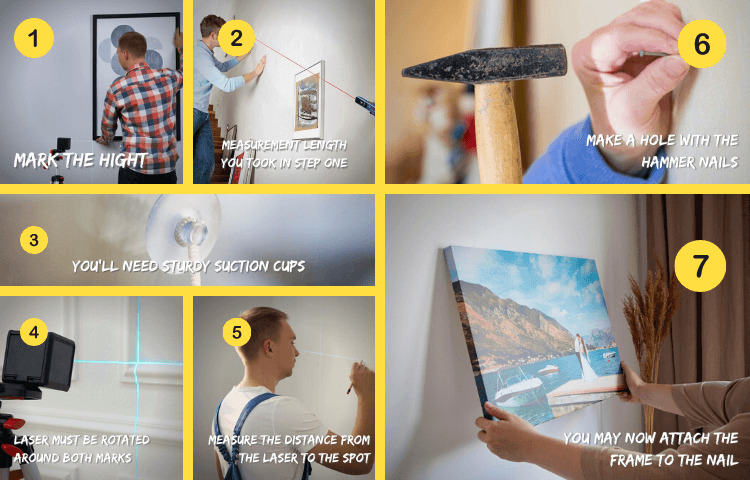
Step 3: Make a mark somewhere along the measurement length you took in step one. Check to see that the mark is horizontal.
Step 4: It is time to fetch the laser level out of the toolbox. To begin, turn it on and make certain that the laser beam is appropriately positioned on the horizontal mark you drew in step 3.
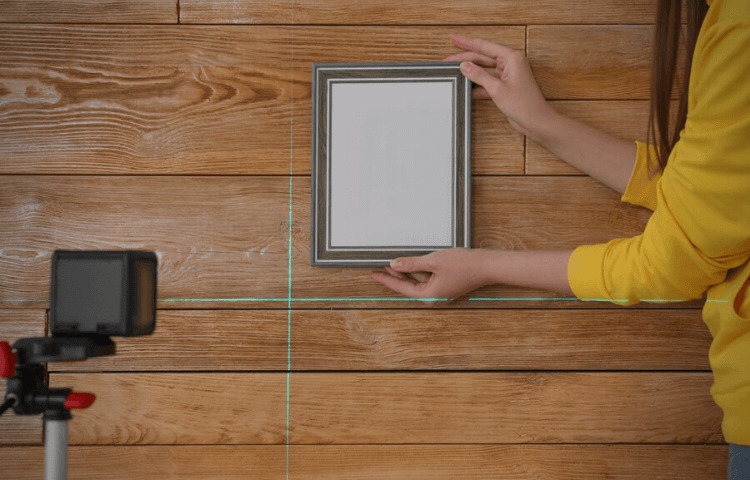
Step 5: The laser must be rotated around both the mark that you created and the place where the two lines meet for the bubble in the vial to rest in the space between the black lines. It needs to be tweaked a bit.
Step 6: It is now time to place the laser level on the wall when it has leveled off and passed through the mark you made with the laser level earlier. To hold the picture to the wall, you’ll need either putty or a set of sturdy suction cups.
Step 7: After you have determined the hanging position and the distance between it and the frame, measure the distance between the laser and the spot where the frame will be hung and draw a mark.
Step 8: The spot on the wall where you created the mark will be where you will obtain the hammer nails to begin making a hole.
Step 9: At this point, you may put the frame on the nail that you previously pounded into the wall and align the image with the laser.
How to Hang the Pictures Correctly?
When hanging your photographs, you want everything to appear perfect. For curved or ledged walls, you’ll need a more accurate measurement to ensure that they hang precisely and don’t seem sloppy when they’re finished.
You need to measure from the top of the frame to the distance between it and the wall where you intend to hang it. Leveling and aligning things up will give you the greatest results in leveling and aligning things up.
Extra Tips
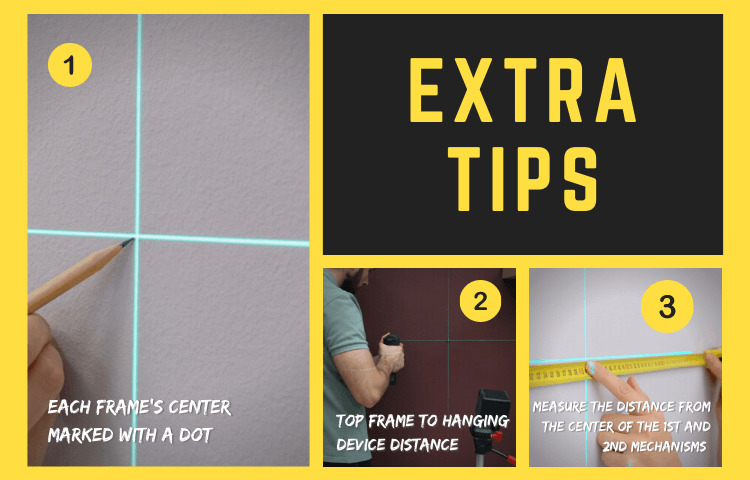
In the case of multiple columns and rows of images that will be hung on a wall that has an overhang, or when you have a curved wall, keep the following measures in mind to ensure appropriate alignment and leveling:
- Each picture frame’s center is marked with a dot.
- The distance between the top of the frame and the device for hanging it.
- Calculate the distance between the center of the hanging mechanism and the center of the picture in frames with two hanging mechanisms.
Bottom Line:
Using a laser level to hang photos is a simple and economical method to make your house appear more polished while saving you money. A laser level is a tool that can’t be messed up. You will never have to be concerned about putting up photographs in your home ever again!! In addition, it is so simple that anyone could do it!


