If you’re like me, you probably don’t like to spend much time hanging curtains. It can be frustrating to get them even on both sides of the window. But with a laser level, it’s easy! In this blog post, I will show you how to use a laser level to hang your curtains perfectly straight every time. Stay tuned!
Materials List To Hang Curtain Using A Laser Level:

This List May Vary on the Situations:
1. Laser Level: It is essential to have a laser level for the job at hand. This will help ensure the curtain rod is hung evenly and straight, making it look better and last longer.
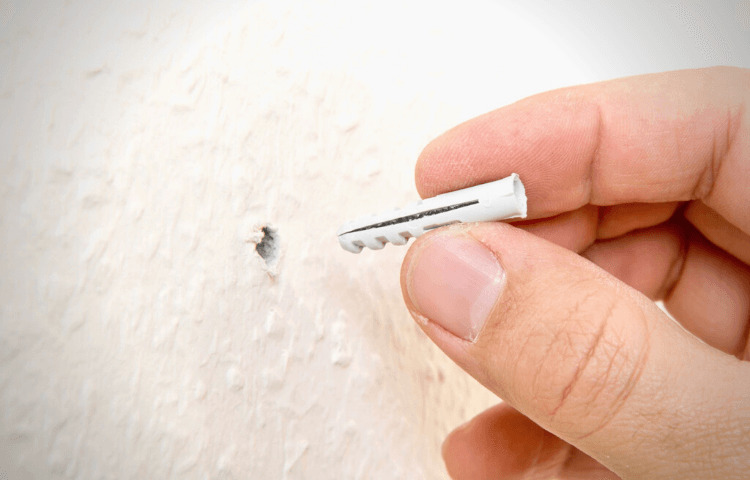
2. Wall Anchors: Wall anchors are required to hold the curtain rod to the wall or ceiling securely. Choose appropriate anchors for your wall or ceiling type and the correct size.
3. Screwdriver: A screwdriver will be needed to attach the wall anchors to the wall or ceiling and secure the curtain rod brackets.
4. Drill Bits: Depending on what kind of anchors you decide to use, you may need appropriate drill bits for the material.
5. Measuring Tape: A measuring tape will be necessary to accurately measure the distance between brackets and ensure the curtain rod is hung at the correct height.
6. Curtain Rod Brackets: The number of brackets you need may vary based on the size and weight of your curtains, so make sure to buy the appropriate amount.
7. Curtain Rod: Choose a rod suitable for your curtains’ size and weight. Make sure it is also long enough to cover the desired area.
8. Screws: To attach the brackets, you will need screws in various sizes depending on how many frames you decide to use.
9. Level: It is helpful to have an additional level handy while hanging the curtain rod, just in case the laser level runs out of battery or malfunctions during installation.
10. Pencil/Marker: It can be helpful to have a marking tool like a pencil or marker to mark where you need to drill the wall anchors or screws. This will help you hang them in the right places.
11. Safety Glasses: It is essential to protect your eyes when drilling or hammering, so wear safety glasses during installation.
12. Hammer: Depending on the anchor used, you may need a hammer to drive the wall anchors into place.
13. Ladder: Depending on the height of the area where you are hanging your curtain rod, you may need a ladder for extra reach and stability while installing it.
14. Dust Sheet: A dust sheet is always helpful when doing any home improvement work as it prevents dust and debris from getting all over your furniture and carpets.
15. Clamps: Clamps can help hold the curtain rod steady while you attach it to the brackets or wall anchors, ensuring everything is secure during installation.
Process:
To begin, you will need to choose which type of curtain rod would work best with the panels you have prepared for the walls. Simple metal rods, which are fuss-free, simple, and easy on the wallet, may be used to create a simple style.
These rods can be covered when the curtains are slid onto them. Consider using ornamental rods with lovely finials on either end for a design that is a step up in formality.
Curtains may be attached to these in a variety of ways, including sliding directly on the pole thru a rod pocket or large decorative steel grommets, being bound by decorative bands or steel drapery hooks or bands, which stick into the rear of the curtain, or being attached by a combination of these.
You may hang curtains using these instructions regardless of the rod type; the first step is to determine the ideal height for the curtains.
1. Determine the Appropriate Height for Mounting:
You may attach the rod or pole merely above the window frame, but if you want a more dramatic effect and to give the impression that the space is more significant, place the rod or pole approximately four to six inches above the window instead.
Ensure that the brackets installed on the rod are deep enough to clear the window frame and allow your drapes to hang correctly.
When calculating the height of the curtain rod, you should keep in mind the usual lengths of curtains, which include 63, 84, and 96 inches, if you want to avoid custom-made panels. Also, think about how you would like the curtain to fall on the floor.
They should fall to the floor or skim it, but if you want them to “puddle” in a formal setting, add extra eight inches to their length.
Be aware that not everyone is a good candidate for such a style, even though it is stunning and dramatic: Puddled draperies have the propensity to accumulate pet hair, it is harder to vacuum around them, and they have the potential to seem “sloppy” if they are not done correctly.
2. Make a Selection for Width:

If you want to open and shut the curtains, ensure that the ornamental rod reaches at least 8 to 12 inches beyond the window. This will allow the drapes to be drawn to the side of the window.
Stick to the same guidelines for calculating the appropriate width, even if using a pole with a rod pocket design. Increasing the window’s width also makes it appear more significant.
In general, the width of the curtain paneling should be about equal to or slightly more significant than the width of the window. This implies that depending on the size of your windows, you may require more than one panel on each side.
An additional support bracket must be installed in the center of any width more significant than sixty inches. This is of utmost significance if the curtains you have chosen are made of a weighty material such as velvet or damask.
Put your markings on the wall with a pencil so you may double-check your work afterward. It is also beneficial to have an assistant who can hold up the pole while you use a laser level or a standard level to ensure that the surface is equal.
3. Install the Wall Brackets:
The curtain rod, regardless of the form of the rod that is used, needs to have sufficient support to avoid becoming drooping and pulling away from the wall.
Even if studs might sometimes be in a different place, you should drill pilot holes and attach brackets if feasible. In such a scenario, it is recommended that you use heavy-duty wall anchors, which, once installed, will extend into the wall to create a superior “grip.” While others may be installed with nothing more complicated than a screwdriver, others must be pre-drilled before installation begins.
4. Measure Everything Twice:
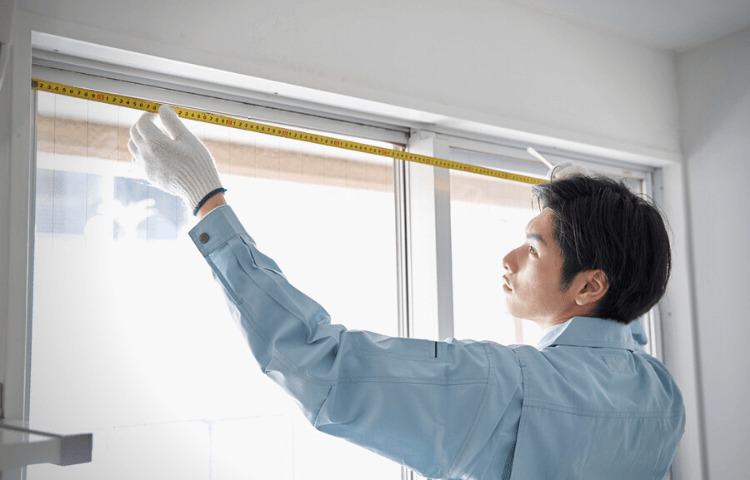
In carpentry, there is an ancient proverb: “Measure twice, cut once.” The same is valid for making holes in things! After you have determined the height and breadth of the rods, you need to double-verify your work because all of these calculations may sometimes lead to confusion.
Then double-check it once more! Believe us when we say it’s far simpler to correct an error before you begin drilling. If you make a mistake, you may fix it later by patching any holes with a bit of spackle.
How To Hang Curtain Using a Laser Level: A Step-by-Step Easy Guide
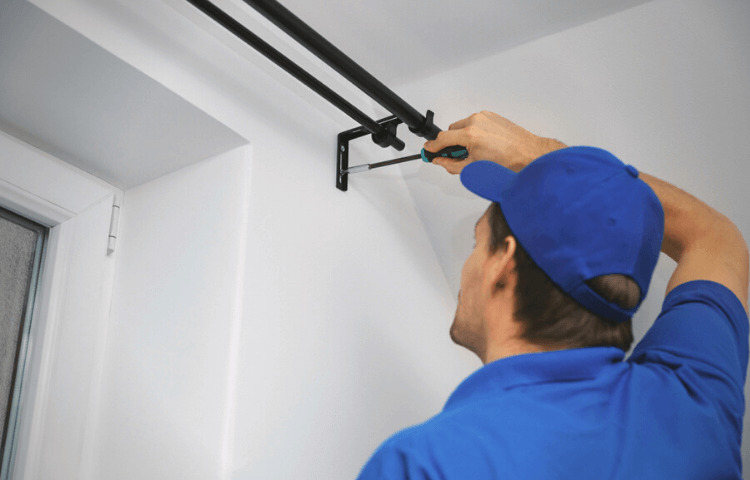
Now that you have all the necessary supplies and equipment, you can start hanging your curtains. First, determine where you want to turn the curtain rod and make a mark on the wall at that spot with a pencil or pen.
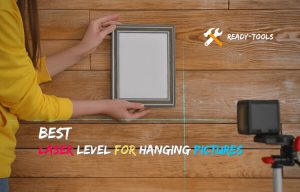
Next, use your laser level to draw a vertical line from the spot you marked for the top of the curtain rod. If you purchased a model with adjustable angles, you could set it to 90 degrees for this step. Make sure to measure and verify that your line is straight before moving on.
Then, place the mounting brackets at the same level as the laser beam and mark them in place. Use your drill to put holes through the shelves and into the wall.
Now, screw the mounting screws through each bracket, ensuring they fit snugly. Finally, slide the curtain rod onto the shelves, and your curtains are ready to hang!
Follow these steps for a perfect curtain installation every time with your laser level as your guide!
Frequently Asked Questions:
How far should curtain rods be spaced apart when hung width-wise from a window?
If you have the space, place your curtain rod 8–12 ” beyond the window frame on both sides. This will enable the curtain panels to rest outside the window and allow more light to enter the room while the curtains open.
Should we let the curtains hang down to the floor?
You have two options to choose from… There are two possible outcomes: your curtains “kiss” the ground or puddle a few inches at the base of the window. Your curtains will give the impression that an amateur hung them if they are any other length.
Where do you hang your curtains, and at what height?
When it comes to hanging curtains, my go-to levels are either one, as near the roof as you can, or two, one-third of the space down from the ceiling. Both of these heights can be found in the first sentence of this paragraph.
How long should the length of the curtain be?
The length of your curtains will be determined by where you intend to put your curtain rod and the hanging technique that your curtains will use. After choosing how far away the curtain rod is and how the curtains will be hung, you will need to decide whether you want the bottom of the curtains to puddle or kiss the ground. Adding 4–6 inches to the overall length of your curtain panel will give you the desired effect of having the curtains fall to the ground. Measure the exact distance to the floor if you want the bottom of the curtains to be flush with the environment.
How wide should you make the curtains?
The curtain slats’ length must be at least 1.5 to 2 times as broad as the window, not including the width of the curtain rod and any additional width you may add. This is done so that the window is covered while the curtains are open and not stretched out flat.
How to put up curtain rods without a drill?
Other options are available if you don’t have a drill but still need to hang up curtain rods. The easiest and most common way is to use a tension rod. Tension rods come in various sizes and are designed to fit into the corners of your window frame or the top of the window space. To put up a tension rod, expand it until its ends fit tightly against each side of the wall or window frame, creating tension that holds it securely in place without needing any screws or nails.
Conclusion:
By following the steps above, you can be sure that your curtains are hung perfectly level every time. And once you get the hang of using a laser level for this task, you’ll find it easy and quick to do. Plus, it’s a lot more fun than using a traditional group! So why not try it next time you need to hang curtains?

